Drive Pinion, Disassembling And Assembling
The disassembling and assembling of the pinion is currently only possible on vehicles without reinforcement.
The pinions can only be differentiated on the sleeve -Item : Sleeve or preload sleeve -Item : Circlip.
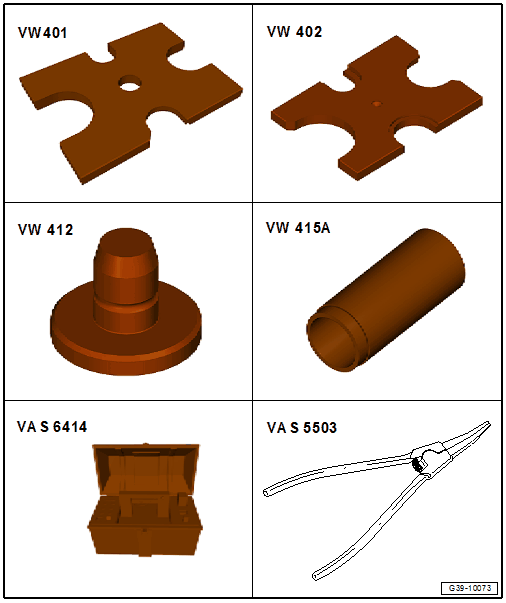
Special tools and workshop equipment required
- Press Plate: VW 401
- Press Plate: VW 402
- Press Piece - Multiple Use: VW 412
- Press Piece - 60mm: VW 415A
- Inductive Heater: VAS 6414
- Circlip Pliers: VAS 5503A
Special tools and workshop equipment required
Remove the circlip for the preload sleeve 1 from the pinion
 Courtesy of AUDI OF AMERICA, LLC
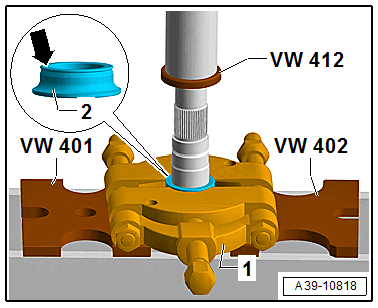
- Position the Thrust Piece: T40413/13 on the pinion -2- so that the groove on the circlip -1- is in the center of the large opening on the Thrust Piece: T40413/13 .
A - Press Piece - Multiple Use: VW412
B - Extracting Tool - Thrust Piece: T40413/13
C - Circlip Pliers: VAS 5503A
D - Press Plate: VW 402
-- Push the preload sleeve together until the circlip -1- can be removed from the groove of the pinion -2-.
Remove the double angular contact ball bearing 2

-- Secure the pinion -3- from falling.
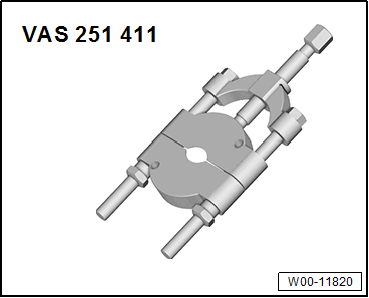
- Splitter (Kukko 17/2): VAS 251 411
- If the lower inner race of the double angular contact ball bearing stays on the pinion, it must be removed separately using the Splitter, for example KUKKO 17-2: VAS 251 411 -1-.
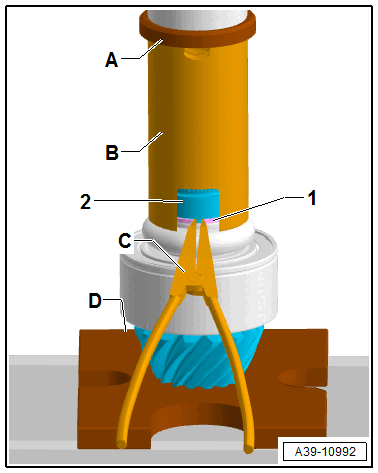
Remove the inner race of the double angular contact ball bearing 2
 Courtesy of AUDI OF AMERICA, LLC
-- Secure the pinion from falling.
-- Secure the Separating Tool -1- in the groove of the inner races -arrow-.
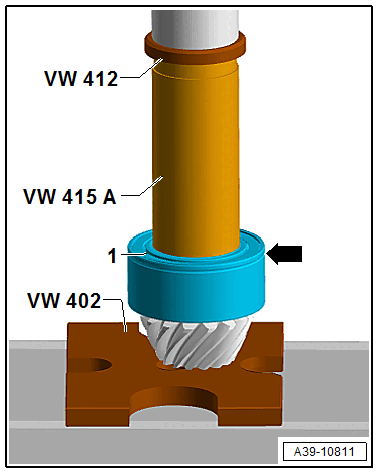
Press the double angular contact ball bearing 1 on the pinion
 Courtesy of AUDI OF AMERICA, LLC
- Installation position of the double angular contact ball bearing -1- : the groove all around -all arrow- points upward to the pressing tool.
-- Warm the double angular contact ball bearing using the Inductive Heater: VAS 6414 to approximately 100 °C (212 °F) and press in all the way.
Install the circlip 1 on the pinion as follows:
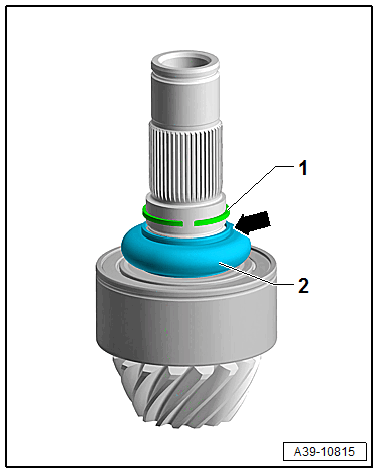
-- Fist install a new preload sleeve -2- in the installation position.
- Installation position of the preload sleeve: the higher collar -arrow- points to the circlip -1-.
- Push a new circlip -1- all the way on the preload sleeve.
Bring the circlip for the preload sleeve 2 into installation position
 Courtesy of AUDI OF AMERICA, LLC
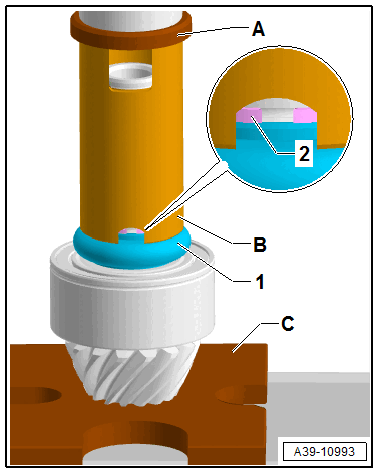
- Position the Thrust Piece: T40413/13 on the pinion so that the groove on the circlip -2- is in the center of the small opening on the Thrust Piece: T40413/13 .
A - Press Piece - Multiple Use: VW412
B - Extracting Tool - Thrust Piece: T40413/13
C - Press Plate: VW402
-- Carefully press the preload sleeve -1- together using the shop press.
-- The circlip must engage audibly in the pinion groove all around.
-- After pressing check that the circlip is in the groove all around.
Risk of damaging the preload sleeve
- Carefully raise the force only until it engages.
- If the preload sleeve is pressed together too much, it can loose its tension force and must be replaced.