Final Drive, Removing:
Pay attention to the general repair information. Refer to REPAIR INFORMATION .
- Tightening specifications. Refer to OVERVIEW - REAR FINAL DRIVE, AUDI A4 AND A5 .
-- Place the vehicle on a hoist.
Incorrect handling can damage the coupling.
- Do not bend the coupling more than 10°.
- Do not load the coupling.
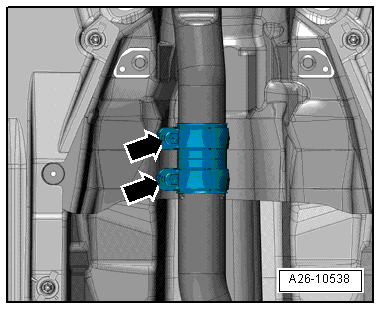
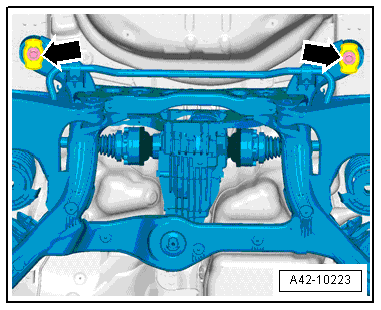
-- Loosen the lock washer(s) -arrows- and separate the exhaust system.
-- Tie up the front exhaust pipe(s) on the side to the underbody.
-- Remove the rear section of the exhaust system. Refer to OVERVIEW - MUFFLER - 2.0L (DMSA) , OVERVIEW - MUFFLER - 2.0L (DPAA) or OVERVIEW - MUFFLER - 3.0L .
-- If equipped, remove the rear diagonal braces. Refer to DIAGONAL BRACES, REMOVING AND INSTALLING .
-- Remove the driveshaft on the rear final drive. Refer to DRIVE SHAFT, REMOVING FROM REAR FINAL DRIVE AND INSTALLING .
-- Remove the bolts -arrows- for the right and left stabilizer bar clamp.
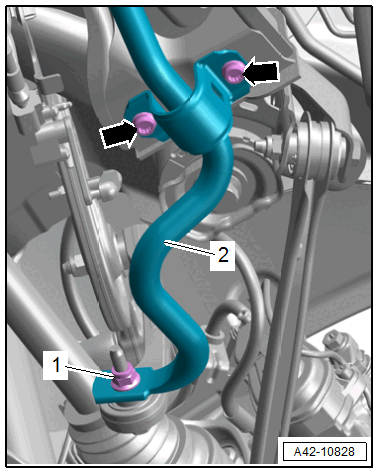
-- Tilt the stabilizer bar slightly downward.
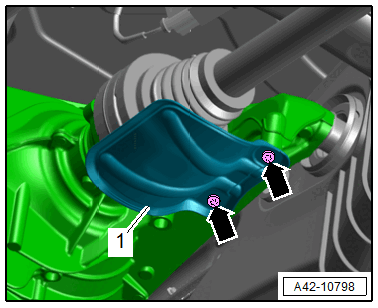
-- If equipped, remove the bolts -arrows- and then remove the heat shield -1- for the left drive axle.
Final Drive 0D3 "quattro sport"
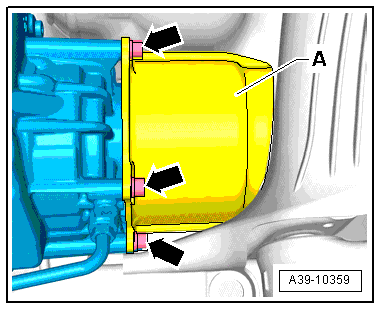
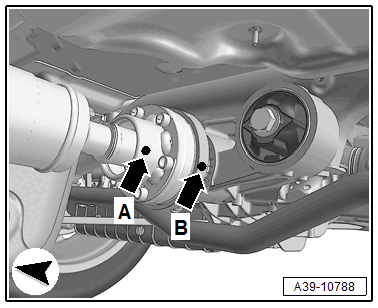
-- Remove the left drive axle heat shield -A- from the final drive -arrows-.
-- If equipped, remove the right drive axles heat shield -A- from the final drive.
Continuation for All
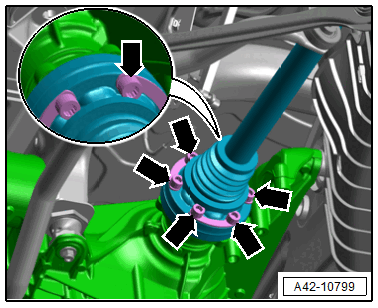
-- Remove the bolts for the left and right drive axle -arrows-.
Final Drive 0D3 "quattro sport"
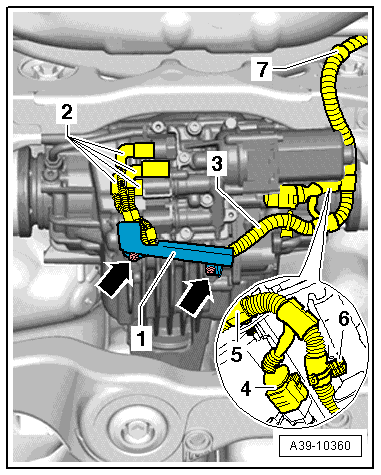
-- Remove the bolts -arrows- and remove the bracket -1- from the rear final drive.
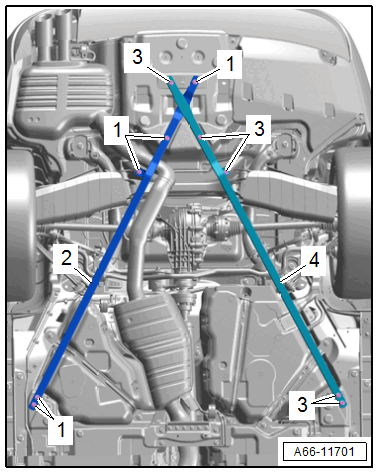
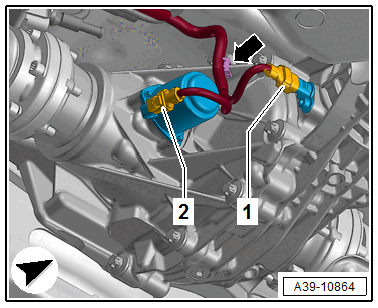
-- Mark the connectors -2- for the Oil Pressure/Temperature Sensor -- and on the Clutch Valves --.
-- Disconnect the connectors -2- from the Oil Pressure/Temperature Sensor -- and the Clutch Valves --.
-- Disconnect the connector -4- from the All-Wheel Drive Pump -V415-.
-- Unclip the wiring harness -3- from the final drive and the subframe and tie it up -items 5 through 7-.
Final drive 0B0 "quattro ultra", 09R "quattro ultra"
-- Disconnect the connectors -1- and -2-.
-- Remove the cable guide from the final drive -arrow- and free up the cable.
Every Audi A4 and A5, except A4 allroad
Lower the rear subframe as follows:
-- Only remove both rear subframe bolts -arrows- far enough that the distance -x- to the longitudinal member is reached at the right and left.
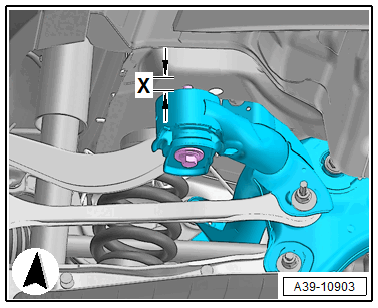
- Dimension -x- = 18 mm maximum
Continuation for All

Risk of damaging the clutch valve by setting down too hard.
- Place a rubber or hard foam mat on the transmission support.
-- Move the Engine and Gearbox Jack: VAS 6931 with the Universal Transmission Support and a rubber or hard foam mat -A- under the rear final drive.
-- Use a Tensioning Strap: T10038 to secure the rear final drive from falling.
-- Remove the nuts -1-, if present.

-- Remove the bolt -2-.
-- Remove the bolts for the rear final drive -arrows-.

-- Press the rear final drive in the -direction of the arrow- towards the right side of the vehicle.
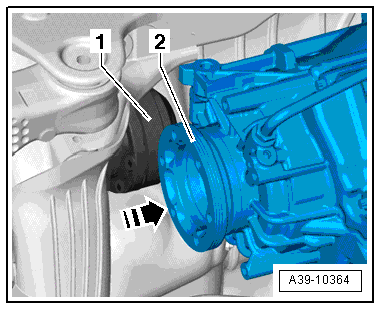
-- While doing so, guide the left drive axle -1- upward out of the flange shaft -2-.
-- Then remove the right drive axle.
-- Carefully lower the rear final drive.
-- Go past the stabilizer bar when lowering.