Final Drive, Installing:

Install in reverse order of removal. Note the following:
- Tightening specifications. Refer to OVERVIEW - REAR FINAL DRIVE, AUDI A4 AND A5 .
Risk of damaging the clutch valve by setting down too hard.
- Place a rubber or hard foam mat on the transmission support.
-- Bring the rear final drive into its installation position using the Engine and Gearbox Jack: VAS 6931 and Universal Transmission Support.
-- At the same time insert the right drive axle into the final drive flange shaft.
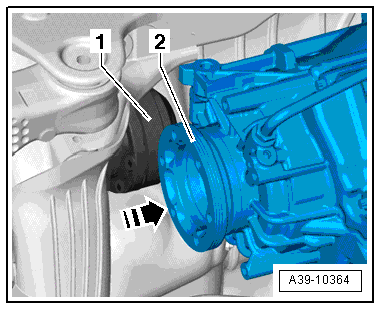
-- Press the final drive in the -direction of the arrow- towards the right side of the vehicle.
-- Guide the left drive axle -1- into the flange shaft -2-.
-- Install the bolt -2- hand-tight.

-- Install the new bolts for the rear final drive -arrows- and tighten.

-- Tighten the bolt -2- and if equipped the nut -1-.
Every Audi A4 and A5, except A4 allroad
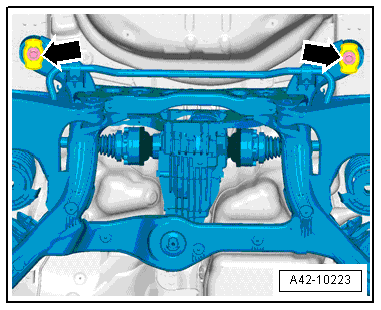
-- Tighten the subframe bolts -arrows-. Refer to OVERVIEW - SUBFRAME .
Continuation for All
-- Remove the Engine and Gearbox Jack: VAS 6931 from under the final drive.
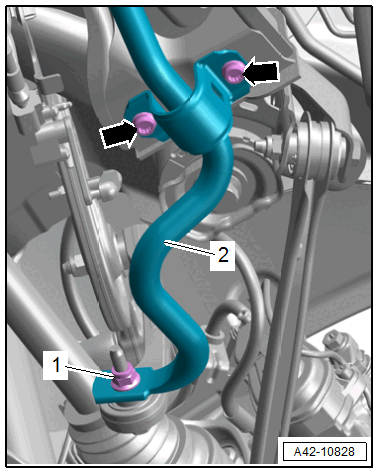
-- Tighten the stabilizer bar -arrows-. Refer to OVERVIEW - STABILIZER BAR .
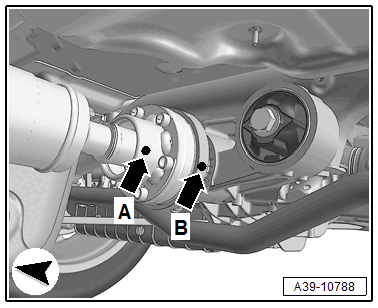
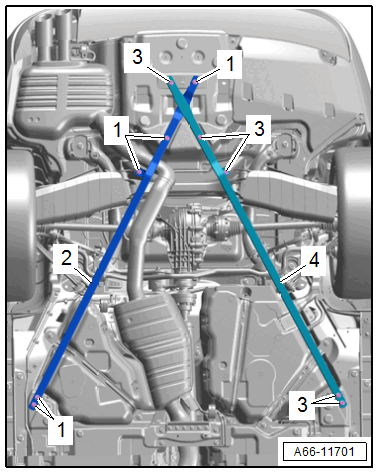
-- Install the driveshaft on the rear final drive. Refer to Figure.
-- Tighten the drive axle. Refer to DRIVE AXLE, REMOVING AND INSTALLING .
-- Install the heat shield -1- for the left drive axle, if equipped.
Final drive 0B0 "quattro ultra", 09R "quattro ultra"
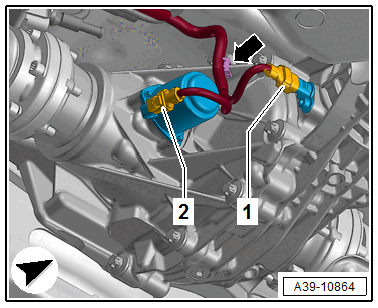
-- Attach the connectors -1- and -2-.
-- Clip the cable guide -arrow- onto the final drive.
Final Drive 0D3 "quattro sport"
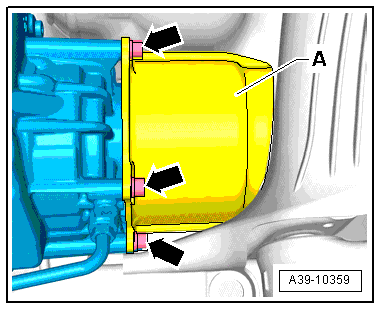
-- Attach the drive axle heat shield -A- to the rear final drive -arrows-.
-- Install the wiring harness -3- to the final drive and subframe -items 5 through 7-.
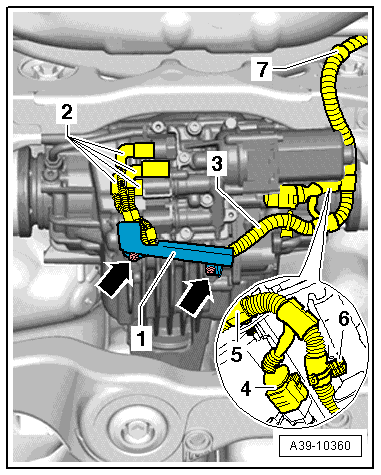
-- Connect the connectors -4- and -2-. Pay attention to the marks made during the removal, that identify the allocation to the Oil Pressure/Temperature Sensor -- and which connectors go to the Clutch Valves --.
Damage to the wiring harness from pinching.
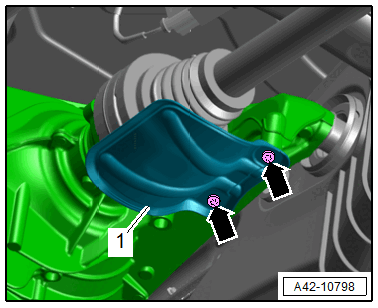
- Make sure the wiring harness -3- does not get pinched when installing the bracket -1- to the rear final drive.
-- Attach the bracket -1- to the rear final drive and tighten the bolts -arrows-. Tightening specification: 9 Nm
Allocation of the connectors for the Oil Pressure/Temperature Sensor and Clutch Valves :

- -1- = Oil Pressure/Temperature Sensor 2 -G640- Connector
- -2- = Oil Pressure/Temperature Sensor -G437- Connector
- -3- = All-Wheel Drive Clutch Valve 2 -N446- Connector
- -4- = All-Wheel Drive Clutch Valve -N445- Connector
-- If equipped, install the rear diagonal braces. Refer to DIAGONAL BRACES, REMOVING AND INSTALLING .
-- Install the rear exhaust system and align it without tension. Refer to OVERVIEW - MUFFLER - 2.0L (DMSA) , OVERVIEW - MUFFLER - 2.0L (DPAA) or OVERVIEW - MUFFLER - 3.0L .
Additional work for vehicles with "quattro sport"
- If the rear final drive 0D3 "quattro sport" was replaced, additional work is necessary. Refer to ADDITIONAL WORK AFTER REPLACING FINAL DRIVE 0D3 "quattro sport" AND 0BX "quattro sport" .
Additional work for vehicles with "quattro ultra"
- If the rear final drive 0B0 "quattro ultra" or 09R "quattro ultra" was replaced, then additional work is necessary. Refer to ADDITIONAL WORK FOR VEHICLES WITH "quattro ultra" .