INPUT SHAFT SEAL, REPLACING, 0DB, 0D2, 0G2, 09R "quattro ultra", 0B0 "quattro ultra": Removing
- The rear final drive is removed.
- Pay attention to the general repair information. Refer to REPAIR INFORMATION .
-- Place the vehicle on a hoist.
Audi Q7

-- Remove the center underbody trim panel. Refer to UNDERBODY TRIM PANEL TUNNEL, REMOVING AND INSTALLING .
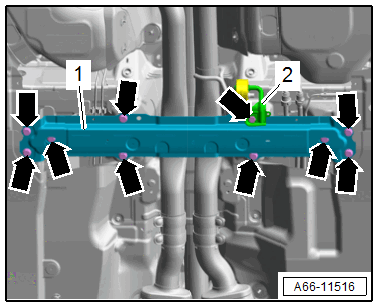
-- Remove the bolts -arrows- and the crossmember -1-.
Incorrect handling can damage the coupling.
- Do not bend the coupling more than 10°.
- Do not load the coupling.
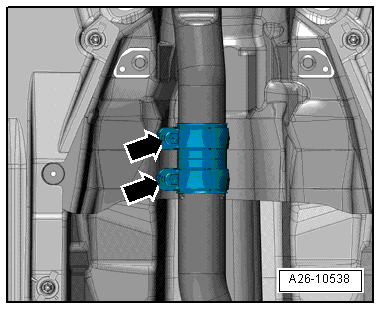
-- Loosen the lock washer(s) -arrows- and separate the exhaust system.
-- Tie up the front exhaust pipe(s) on the side to the underbody.
Audi A4 and A5
-- Remove the rear section of the exhaust system. Refer to OVERVIEW - MUFFLER - 2.0L (DMSA) , OVERVIEW - MUFFLER - 2.0L (DPAA) or OVERVIEW - MUFFLER - 3.0L .
Continuation for all vehicles
-- Remove the driveshaft on the rear final drive. Refer to DRIVE SHAFT, REMOVING FROM REAR FINAL DRIVE AND INSTALLING .
-- Tie the driveshaft to the side.
-- Remove the High Temperature Grease in the flange/driveshaft.
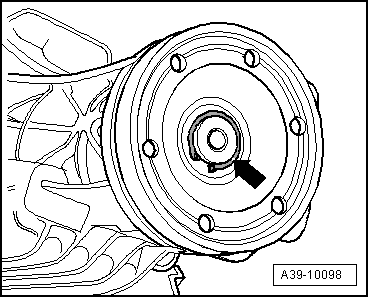
-- Remove the circlip -arrow-.
- Replace the circlip with a new one of the same thickness if it is stretched or damaged. Refer to the Parts Information for the allocation.
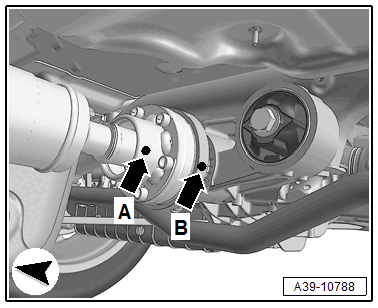
-- Mark the position of the flange/driveshaft -B- on the pinion -A- -arrow-.

- This marking -arrow- is needed so the colored dot -C- on the outer flange remains in its original position.
- This ensures the imbalance in the rear final drive will be as small as possible.
-- Secure the Puller - Multiple Use: VW 391 with Two M 8 x 30 Bolts -arrow- on the flange/driveshaft.
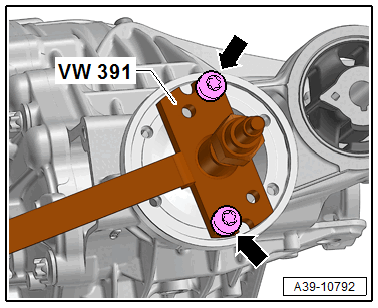
-- Remove the flange/driveshaft using the Puller - Multiple Use: VW 391 .
-- Place the Used Oil Collection and Extraction Unit: SMN372500 underneath.
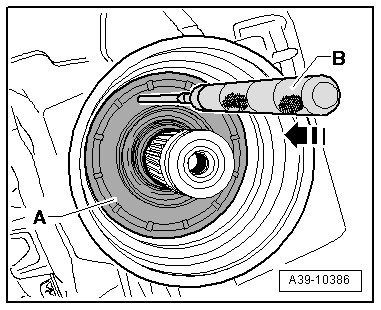
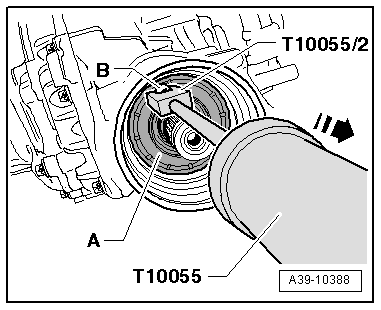
-- Knock through the metal ledge of the shaft seal -A-, for example, with a scriber -B- in the -direction of the arrow-.
-- Then install a bolt -arrow- in this shaft seal opening -A-.
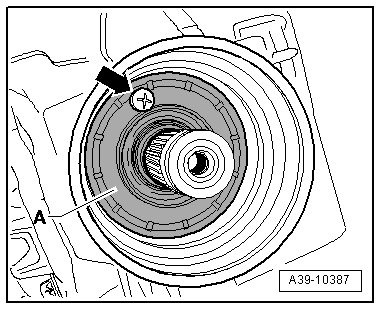
-- Remove the shaft seal -A- for the flange/driveshaft over the bolt -B- in the -direction of the arrow-.