All-Wheel Drive Clutch, Removing And Installing: Installing
Install in the reverse order of removal while noting the following:
- Tightening specifications. Refer to OVERVIEW - ALL-WHEEL DRIVE CLUTCH .
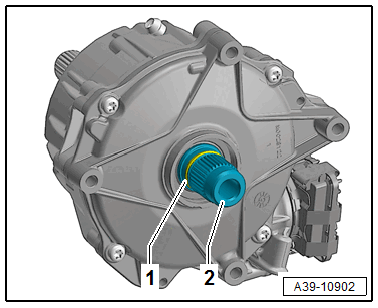
-- Check the O-ring -1- on the all-wheel drive clutch input shaft -2- for damage and if necessary replace.
-- Apply a thin layer of Sealing Grease: G 052 128 A1 on the splines of the all-wheel drive clutch input shaft.
-- Place the all-wheel drive clutch -1- on the transmission and tighten the bolts -arrows- hand-tight.
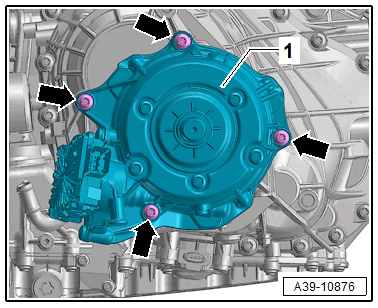
-- Tighten the bolts -arrows- diagonally to the tightening specification.
-- Connect the connector -3- to the All-Wheel Drive Control Module -- -4-.

-- Secure the cable to the all-wheel drive clutch -arrow-.
-- If equipped, secure the heat shield -2- with the bolts -1-.
-- Lift the transmission slightly using the Engine and Gearbox Jack: VAS 6931 .

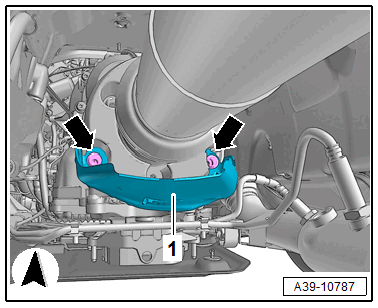
-- Tighten the tunnel crossmember bolts -arrows-. Tightening Specification. Refer to the appropriate Service Information .
-- Check the ATF fluid level of the all-wheel drive clutch. Refer to OIL LEVEL, CHECKING .
-- Install the driveshaft. Refer to DRIVESHAFT, REMOVING AND INSTALLING .
-- If equipped, install driveshaft heat shield -1-.
-- Install the rear noise insulation. Refer to NOISE INSULATION, REMOVING AND INSTALLING .
If the clutch was replaced:
- If the all-wheel drive clutch was replaced, it must be activated under Guided Functions in the 22 - AWD electronics folder with the function 22 - Replace control module . Refer to ADDITIONAL WORK WHEN REPLACING ALL-WHEEL DRIVE CLUTCH .