Brake Caliper, Removing And Installing: Installing
Install in reverse order of removal and note the following:
- Always replace brake pads on the same axle at the same time.
- Use the complete repair kit when installing new brake pads.
- Clean the bolts and nuts before reusing.
- Replace damaged bolts and nuts.
- Replace the self-locking bolts and nuts after removal.
-- If the brake pads are being replaced, check the brake rotors for wear and damage.
- Brake rotor wear limit. Refer to TECHNICAL DATA, BRAKES .
Health risk due to toxic dust from the brake system.
Irreversible deposit of dust particles in the lungs. Breathing may become impaired.
- Never blow out the brake system with compressed air.
- Use only mineral spirits to clean the brake caliper.
-- Carefully slide the brake caliper with the brake carrier and the installed brake pads over the brake rotor.
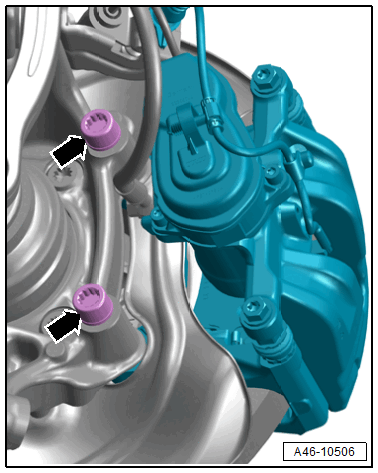
-- Tighten the new brake carrier bolts -arrows-.
- Make sure the brake hose is routed correctly.
- Make sure the brake hose is not blocked, bent, twisted or rubbing against the vehicle.
-- Install the brake pad wear indicator wire. Refer to BRAKE PAD WEAR INDICATOR WIRE, REMOVING AND INSTALLING .
-- Drive the parking brake motors up using the Vehicle Diagnostic Tester by following the instructions in the display.
Faulty brakes increase the risk of an accident.
- Make sure the brakes are working correctly before driving the vehicle for the first time.
-- With the vehicle stationary, firmly press the brake pedal several times so that the brake pads in the operating condition properly sit in their respective position.