Windshield, Removing And Installing: Removing
-- A4, A5 Coupe, and A5 Sportback: remove the drip rail. Refer to DRIP RAIL, REMOVING AND INSTALLING .
-- Remove the plenum chamber cover. Refer to PLENUM CHAMBER COVER, REMOVING AND INSTALLING .
Equipment Version with Windshield Defogger:
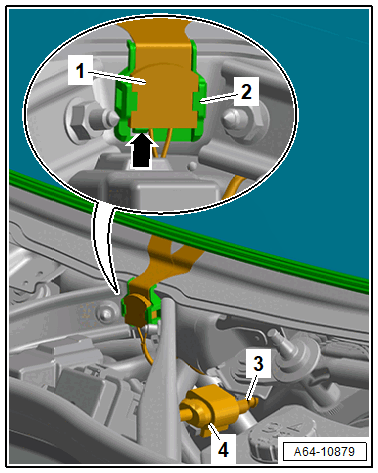
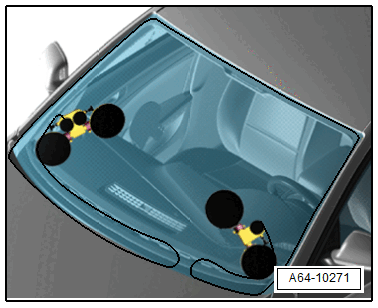
-- Disconnect the connector -4- and free up the connector housing -3-.
-- Release the catch -arrow- and push the harness -1- for the windshield defogger downward out of the bracket.
-- Place the connection cable with the harness upward on the windshield and secure using adhesive tape.
-- Remove the front interior lamp/reading lamp. Refer to FRONT INTERIOR LAMP/READING LAMP, REMOVING AND INSTALLING .
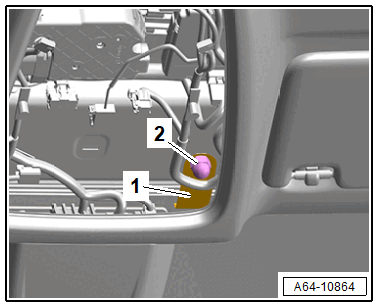
-- Remove the nut -2-.
-- Free up the ground cable -1-.
Continuation:
-- Remove the sun visors and the sun visor center support. Refer to OVERVIEW - SUN VISORS .
-- A5 Cabriolet: remove the windshield frame trim. Refer to WINDSHIELD FRAME TRIM, REMOVING AND INSTALLING .
-- Remove the interior rearview mirror. Refer to INTERIOR REARVIEW MIRROR, REMOVING AND INSTALLING .
-- Remove the left and right A-pillar trim panels. Refer to A-PILLAR TRIM PANEL, REMOVING AND INSTALLING .
If the windshield is replaced, additionally install:
-- Remove the rain/light recognition sensor. Refer to RAIN/LIGHT RECOGNITION SENSOR, REMOVING AND INSTALLING .
-- Remove the driver assistance systems front camera. Refer to DRIVER ASSISTANCE SYSTEMS FRONT CAMERA, REMOVING AND INSTALLING .
-- Disconnect the connectors, if equipped.
Risk of injury to the hands and eyes from glass fragments.
Getting cut is possible.
- Wear protective eyewear.
- Wear safety gloves.
-- Unroll approximately 6.5 meters of cutting wire (approximately six turns) with the : VAS6452/1 and cut it.
-- To prevent any damage, cover the area where the awl comes out at the bottom of the body flange with adhesive tape -1-.
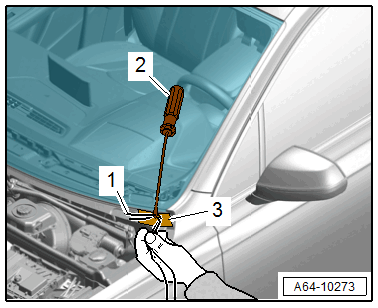
-- Working from the inside outward, pierce the adhesive bead in this area using the awl -2-.
-- Thread both cutting wire ends -3- into the awl and pull it toward the inside.
-- Place the cutting wire all the way around under the windshield.
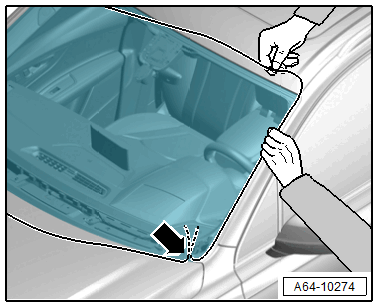
- The wire ends must not be twisted on the adhesive bead pass-through -arrow-.
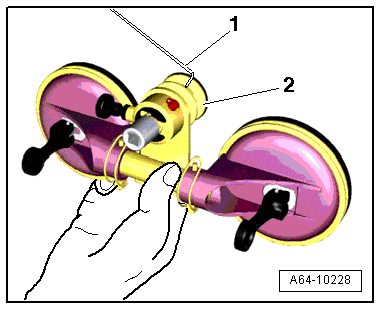
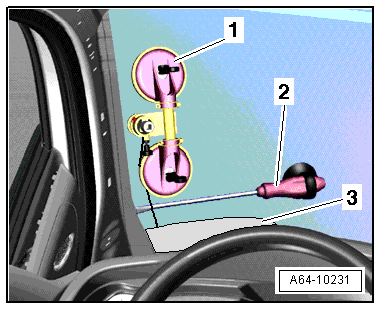
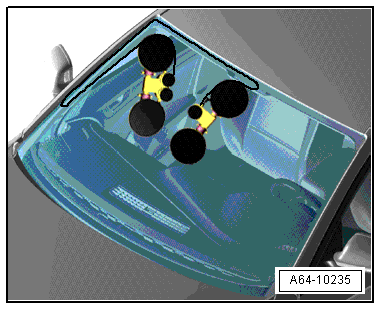
-- Mount both reel devices on the inside of the glass.
-- Insert the cutting wire end -1- into the reel device -2-.
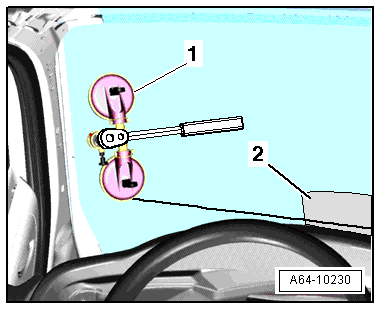
-- Tension the cutting wire and place the protective film -2- between the instrument panel and the cutting wire.
 Courtesy of AUDI OF AMERICA, LLC
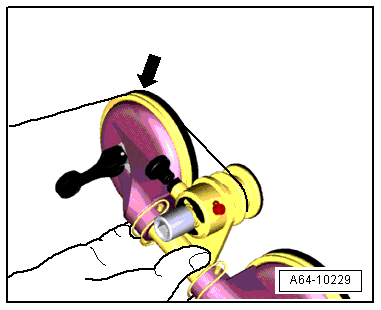
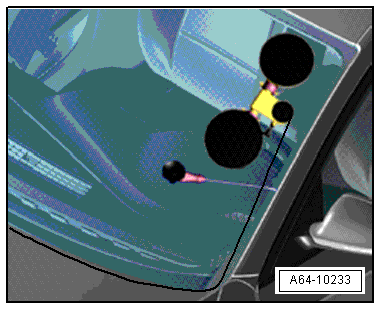
-- Cut the first section free. This will guide the cutting wire into the integrated idler roller -arrow- on the reel device.
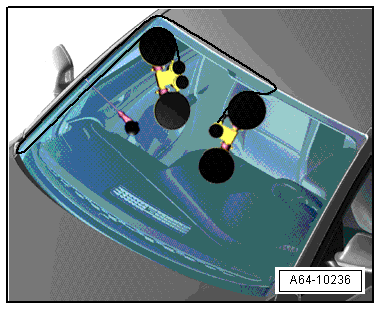
-- Insert an additional guide awl -2- into the adhesive bead and secure it to the window glass with the suction cup to make sure that the cutting wire runs as close to the glass as possible.
-- If necessary, move the protective film -3- along with the wire and continue cutting the window glass free with the reel device -1-.
-- Move the reel device and the guide awl and cut the area at the A-pillar free.
-- Move the reel device and guide awl up to the center of the glass.
-- Cut the window glass free up to the center of the glass.
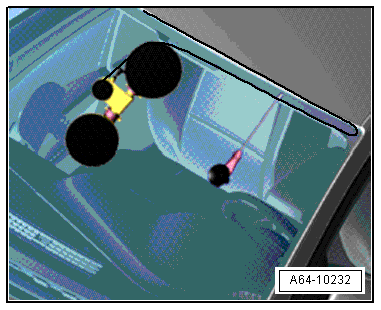
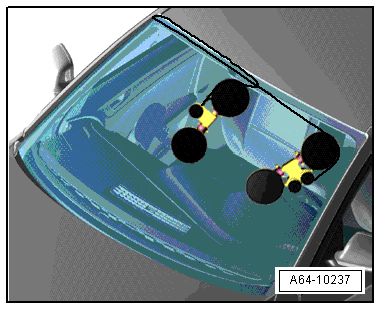
-- Use the second reel device to cut the lower section of the window glass free.
 Courtesy of AUDI OF AMERICA, LLC
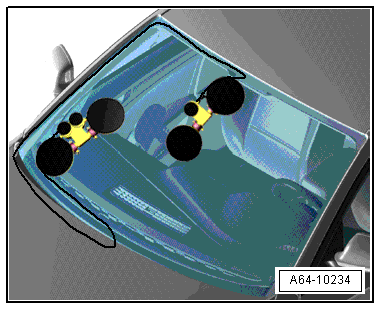
-- Move the reel device upward and insert the guide awl.
-- Cut the window glass out by moving upward along the A-pillar.
-- Move the reel device over the center of the window glass and over the first reel device and cut the windshield completely free at the upper edge.
-- Remove the windshield from the opening for the window using the Double Suction Lifter : VAG1344 at the same time guide the equipment version with the windshield defogger on the ground cable between the body and headliner and secure it with adhesive tape on the windshield.