Upper Frame, Removing And Installing, Seat Height Adjustment Motor: Removing
Risk of injury due to involuntary deployment.
- Pay attention to the safety precautions when working with pyrotechnic components. Refer to SAFETY PRECAUTIONS WHEN WORKING WITH PYROTECHNIC COMPONENTS .
- Before handling pyrotechnic components (for example, disconnecting the connector), the person handling it must "discharge static electricity". For example, this can be done by briefly touching the door striker.
-- Move the front seat to the highest position possible to keep the torsion bar tension as low as possible.
-- Remove the front seat. Refer to FRONT SEAT, REMOVING AND INSTALLING .
-- Fasten the front seat on the : VAS6136 . Refer to FRONT SEAT, MOUNTING ON FIXTURE FOR SEAT REPAIR .
-- Remove the backrest. Refer to FRONT BACKREST, REMOVING AND INSTALLING .
-- Remove the cushion. Refer to SEAT PAN COVER AND CUSHION, REMOVING AND INSTALLING .
-- Remove the seat depth adjuster. Refer to SEAT DEPTH ADJUSTER, REMOVING AND INSTALLING .
-- Remove the seat angle adjuster. Refer to SEAT ANGLE ADJUSTER, REMOVING AND INSTALLING .
-- Remove the front and rear bolts -arrows- on the left and right side.
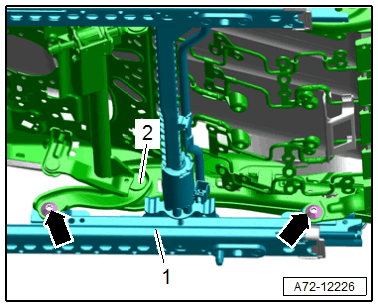
-- Remove the seat pan upper frame -2- from the lower frame -1- and place it on a clean surface.
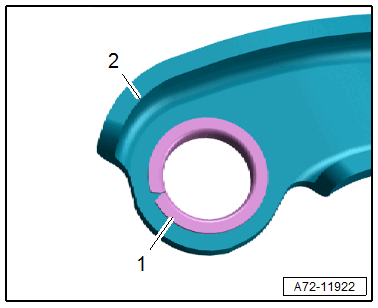
Risk of damaging the bushings -1- in the bearing points -2- (upper/lower frame bolted connection).
- The bushings cannot be replaced with workshop materials.
- If the bushings are damaged, the corresponding parts must be replaced.