Driver Assistance Systems Front Camera, Replacing: Installing
Install in reverse order of removal and note the following:
- The camera field of vision on the inside of the windshield must not be fogged up or dirty.
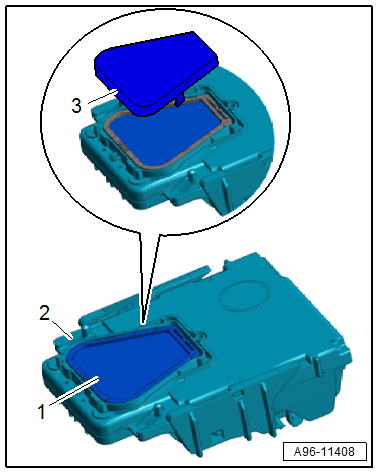
-- Release the catch and remove the protective cap -3- from the front camera -2-.
TIP:
To avoid contaminating the silicone pad, remove the protective cap just before installing it.
-- Connect the connector.
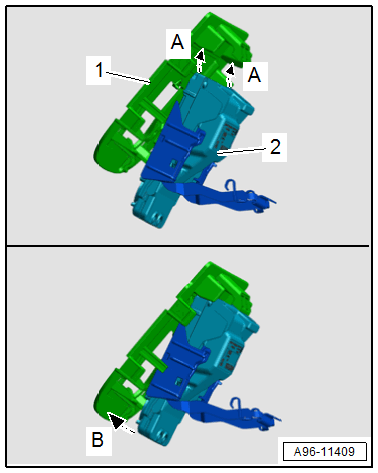
-- Insert the front camera -2- in the mount -1- in direction of -A arrows-.
-- Push the front camera using light force onto the mount in direction of -arrow B-.
TIP:
If not all bubbles are removed then pressing on the silicone pad, the bubbles will be pushed out on the windshield when locking the front camera due to contact pressure. The silicone pad is designed so that any air pockets will be diffused by the silicone pad.
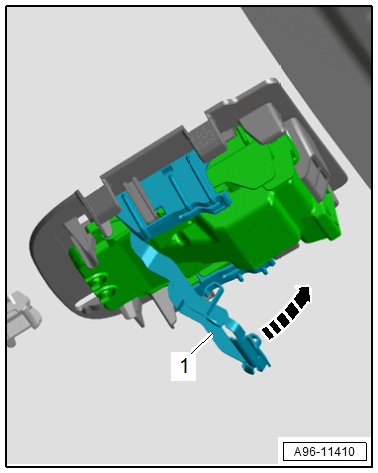
-- Press the front camera against the windshield and close the securing clip -1- in the direction of the -arrow-.
-- Make sure that all four sides engage with the retaining plate.
- To prevent malfunctions in the assistance systems, the driver assistance systems front camera must not have any embedded objects or bubbles between it and the windshield.
-- Calibrate the driver assistance systems front camera. Refer to DRIVER ASSISTANCE SYSTEMS FRONT CAMERA, CALIBRATING .