Carpet, Removing And Installing: Removing
-- Remove the front seats. Refer to FRONT SEAT, REMOVING AND INSTALLING .
-- Remove the center console. Refer to CENTER CONSOLE, REMOVING AND INSTALLING .
-- Remove the center console bracket. Refer to CENTER CONSOLE BRACKET, REMOVING AND INSTALLING .
-- Remove the Access/Start System Antenna 1 in Vehicle Interior -R138- with the bracket. Refer to ACCESS/START SYSTEM ANTENNA 1 IN VEHICLE INTERIOR -R138- , REMOVING AND INSTALLING .
-- Equipped on some models: remove the rear air duct. Refer to OVERVIEW - AIR ROUTING AND AIR DISTRIBUTION IN VEHICLE INTERIOR .
-- Remove the footrest. Refer to FOOTREST, REMOVING AND INSTALLING .
-- Remove the bench seat / bucket seats. Refer to BENCH SEAT/SINGLE SEAT, REMOVING AND INSTALLING .
-- Remove the front sill panel strip. Refer to FRONT SILL PANEL, REMOVING AND INSTALLING .
-- Remove the B-pillar lower trim panels. Refer to B-PILLAR LOWER TRIM PANEL, REMOVING AND INSTALLING .
-- Remove the floor mats.

-- If required, separate and free up the front carpet on the left and right sides of the center tunnel near the instrument panel crossmember at the perforation -arrows- .
-- Push the rear sill panels in the area of the carpet to the side.
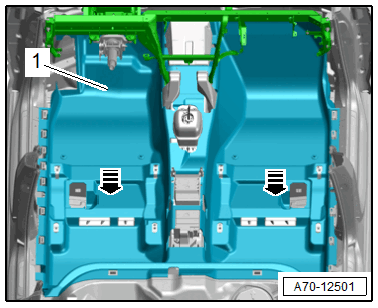
-- Lift the rear carpet -1- and pull it toward the rear in direction of -arrows- .
-- Fold and remove the carpet in the center.
Make sure the carpet does not tear at the openings.