Impact Member, Removing and Installing
-- Remove the wheel housing liner. Refer to FRONT WHEEL HOUSING LINER, REMOVING AND INSTALLING .
-- Remove the bumper cover. Refer to BUMPER COVER, REMOVING AND INSTALLING .
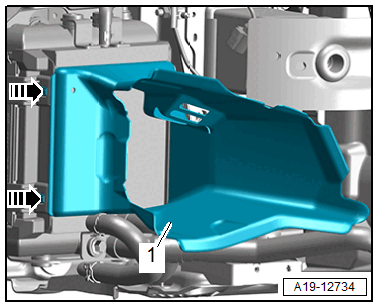
-- RS 4 and RS 5: release the catches on both sides in direction of -arrows-.
-- If equipped, free up the wiring harness.
-- Remove the air duct -1- towards the front.
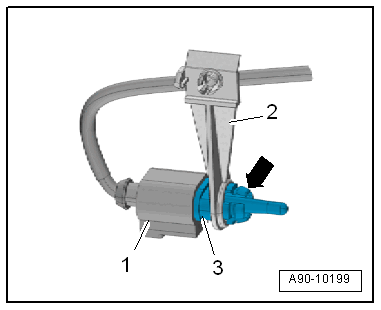
-- If equipped, remove the headlamp washer system spray nozzle and set it aside with the washer fluid hose still connected. Refer to WASHER NOZZLES, REMOVING AND INSTALLING .
-- If equipped, place the drip tray under the separating point and disconnect the washer fluid hose -3- by pressing the release buttons in direction of -arrows-.
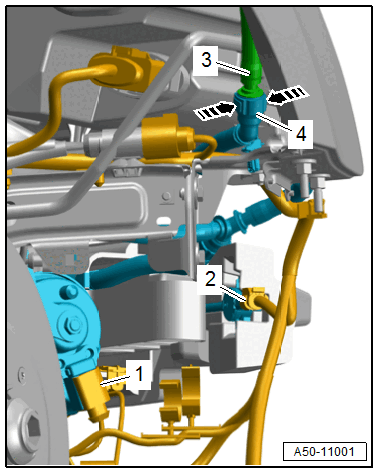
-- Free up the washer fluid hose -4-.
Vehicles equipped with pedestrian protection:
Pyrotechnical components can deploy unintentionally.
Risk of injury.
- Discharge the static electricity: quickly touch the door striker.
-- Disconnect the connector -2- from the pedestrian protection crash sensor.
Continuation:
-- Disconnect the connector -1- from the Outside Air Temperature Sensor -G17- -3- and free up the wiring harness.
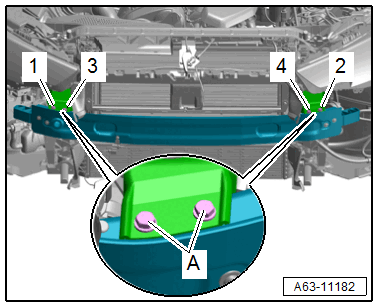
-- Loosen the threaded connection -1 through 4- and remove the bolts -A- upward.
If the bolts cannot be removed:
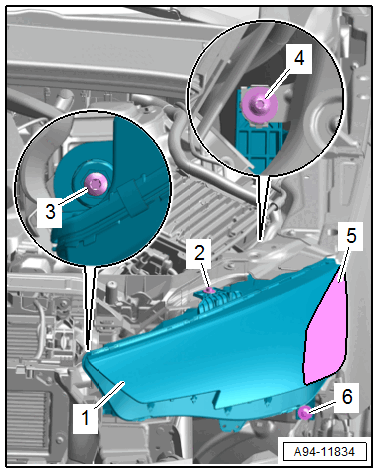
-- Apply adhesive tape -5- to the headlamp -1- near the fender.
-- Remove the bolts -2, 3, 4 and 6-.
TIP:
After removing the bolts secure the headlamps again with the bolts.
Continuation:
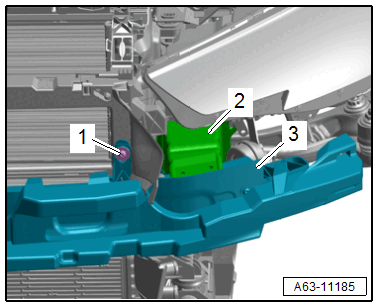
-- Remove the bolt -1-.
-- Remove the impact member -3- from the mount -2-.