Brake Master Cylinder, Removing And Installing: Installing
Install in reverse order of removal and note the following:
Make sure that the actuator pin for the brake lamp is pushed in the brake master cylinder before installing the brake master cylinder. The brake lamp will not function without this pin. Refer to NOTE .
Replace the seal after removal.
There is a risk of damaging the brake booster.
- Do not let any brake fluid run into the brake booster.
There is a risk of brake lamps not functioning.
- The actuator pin for the brake lamp switch must be inserted in the brake master cylinder. Refer to NOTE
-- When inserting the brake master cylinder -1-, make sure that the pressure rod -3- is seated correctly in the brake booster -2-.
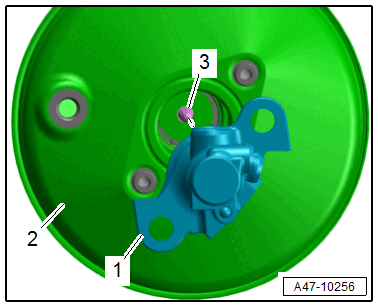
-- If necessary, have a second technician press the brake pedal slightly. This allows the brake master cylinder to be guided into pressure rod more easily.
-- Install the brake fluid reservoir. Refer to BRAKE FLUID RESERVOIR, REMOVING AND INSTALLING .
Vehicles with Manual Transmission
-- Slide the return hose -1- to the clutch master cylinder completely onto the brake fluid reservoir connection.
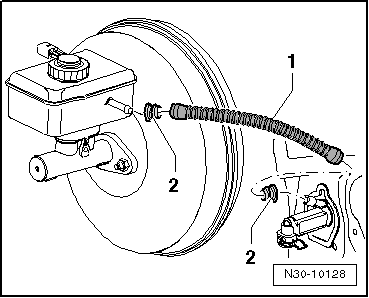
There is a risk of brake fluid loss. The return hose for the clutch hydraulics -1- must sit correctly and securely on the brake fluid reservoir connection.
Continuation for All Vehicles
-- Install the plenum chamber bulkhead. Refer to OVERVIEW - BULKHEAD .
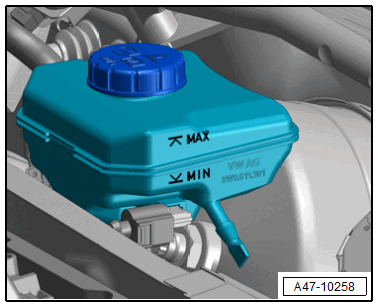
-- Fill the brake fluid reservoir up to the "MIN" mark.
Remove all cloths from the vehicle that were previously placed down.
Vehicles with Manual Transmission
-- Bleed the clutch hydraulics. Refer to the appropriate service information .
Continuation for All Vehicles
Install the plenum chamber bulkhead. Refer to OVERVIEW - BULKHEAD .
-- Bleed the brake system. Refer to HYDRAULIC SYSTEM, BLEEDING .
-- Seal the brake fluid reservoir with the cap: 1.5 ± 0.5 Nm
Install the plenum chamber cover. Refer to PLENUM CHAMBER COVER, REMOVING AND INSTALLING .