Control Arm Bearing, Replacing, SUBFRAME Side: Procedure
- The control arm is removed. Refer to CONTROL ARM, REMOVING AND INSTALLING .
Bonded Rubber Bushing, Pressing Out
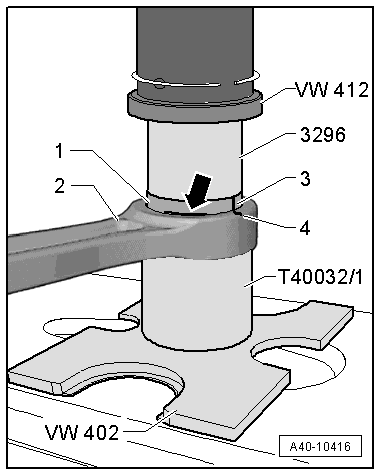
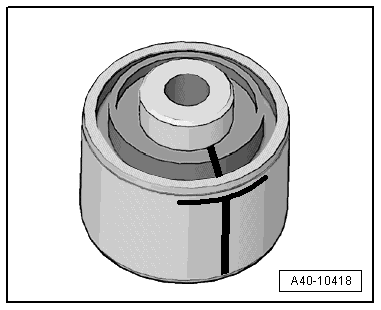
-- Mark the press-in depth -arrow- and the installation position -3 and 4- on the bonded rubber bushing -1- as shown using, for example, a waterproof felt-tip pen.
-- Arrange the special tools as shown.
Hold the control arm firmly in position while pressing the bonded rubber bushing out and in.
-- Press out the bonded rubber bushing from the control arm -2-.
Bonded Rubber Bushing, Pressing In
-- Transfer the press-in depth mark from the old bonded rubber bushing to the new one.
-- Thinly coat the bonded rubber bushing with Assembly Paste:G 052 109 A2 .
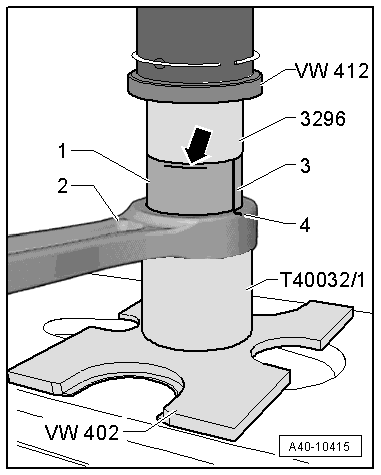
-- Insert the bonded rubber bushing -1- in the control arm -2- and align to the mark -3 to 4-.
-- Arrange the special tools as shown.
-- Press the bonded rubber bushing in the control arm, and do not tilt it.
-- Pay close attention to the press-in depth mark -arrow-.
-- Check the press-in depth of the bonded rubber bushing -1- in the control arm -2-.
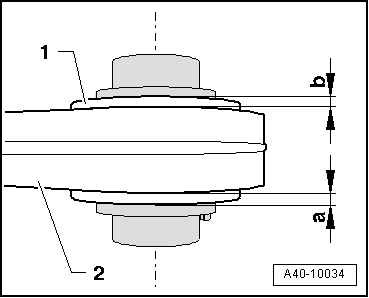
- Specified value: Dimension -a- = dimension -b-.
-- If the values are different, press in the bonded rubber bushing again.