Replacing the valve stem seals
Preliminary work
- Refer to REMOVING THE EXHAUST TURBOCHARGER (CYLINDER HEAD REMOVED) .
- Refer to INSTALLING THE CYLINDER HEAD ON THE ASSEMBLY JIG .
- Refer to ADJUSTING THE ECCENTRIC SHAFT TO THE MINIMUM LIFT (CYLINDER HEAD REMOVED) .
- Refer to CHECKING THE POSITION OF THE INTAKE CAMSHAFT (CYLINDER HEAD REMOVED) .
- Refer to REMOVE TORSION SPRINGS .
- Refer to REMOVING ALL GATES .
- Refer to REMOVING ALL INTERMEDIATE LEVERS .
- Refer to REMOVE INTAKE CAMSHAFT .
- Refer to REMOVE THE SERVOMOTOR FOR THE ECCENTRIC SHAFT (CYLINDER HEAD REMOVED) .
- Refer to REMOVE ECCENTRIC SHAFT .
- Refer to REMOVE EXHAUST CAMSHAFT .
- Refer to REMOVE ALL ROLLER CAM FOLLOWERS .
- Refer to REMOVE ALL VALVE SPRINGS .
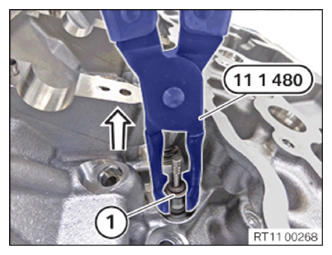
- Remove valve stem seals
NOTE:
RISK OF DAMAGE
Contaminant or foreign body.
Contamination can result in malfunctions, loss of function or leaks.
Contaminant or foreign body.
Contamination can result in malfunctions, loss of function or leaks.
- Adhere to the utmost cleanliness.
- Protect components from contamination e.g. by covering.
- Close off line connections with seal plugs.
NOTE:
The description is for one component only. The procedure is identical for all further components.
- Installing valve stem seals
NOTE:
RISK OF DAMAGE
Contaminant or foreign body.
Contamination can result in malfunctions, loss of function or leaks.
Contaminant or foreign body.
Contamination can result in malfunctions, loss of function or leaks.
- Adhere to the utmost cleanliness.
- Protect components from contamination e.g. by covering.
- Close off line connections with seal plugs.
NOTE:
The description is for one component only. The procedure is identical for all further components.
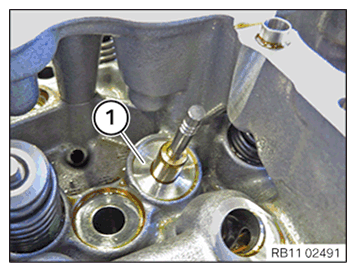
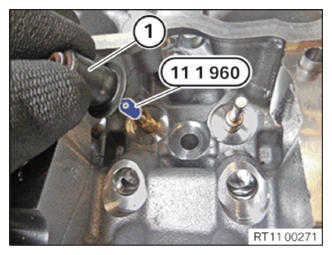
- Remove oil and dirt from the contact surface (1).NOTE: TECHNICAL INFORMATION
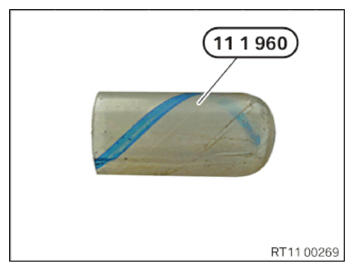
As an alternative to special tool 0 490 797 (11 1 960), the assembly sleeves delivered with the spare part can be used (see applicable BMW parts catalogue). - Refer to Make sure that the special tool 0 490 797 (11 1 960) or the assembly sleeves are used when
installing the valve stem seal.
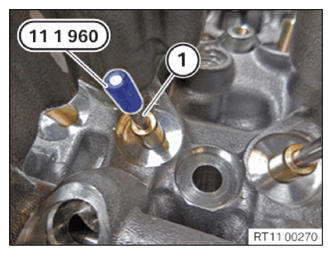
- Refer to Guide in and install special tool 0 490 797 (11 1 960) or assembly sleeves on valve (1)
.
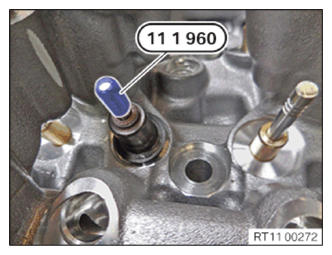
- Replace the valve stem seal (1) or assembly sleeves.
Parts: Valve stem seal, assembly sleeves
- Guide in and install valve stem seal (1) on special tool 0 490 797 (11 1 960)
or assembly sleeves.
- Refer to Guide out and remove special tool 0 490 797 (11 1 960) or assembly sleeves
.
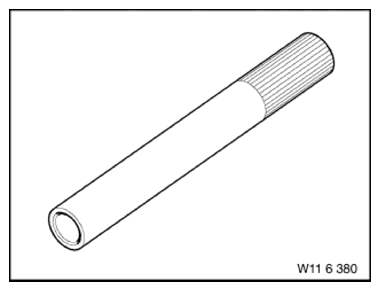
- Prepare special tool 0 493 249 (11 6 380)
.
- Press the valve stem seal (1) onto the cylinder head 0 493 249 (11 6 380)
up to the stop using special tool.
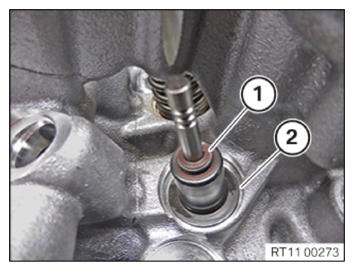
- Make sure that the valve stem seal (1) is correctly positioned on the cylinder head (2).

Follow-up work
- Refer to INSTALL ALL VALVE SPRINGS .
- Refer to INSTALL ALL ROLLER CAM FOLLOWERS .
- Refer to INSTALL EXHAUST CAMSHAFT .
- Refer to INSTALL ECCENTRIC SHAFT .
- Refer to INSTALL INTAKE CAMSHAFT .
- Refer to CHECKING INSTALLATION POSITION OF ROLLER CAM FOLLOWERS
- Refer to CHECKING THE INTERMEDIATE LEVER CLASSIFICATION .
- Refer to INSTALLING ALL INTERMEDIATE LEVERS .
- Refer to INSTALLING ALL GATES .
- Refer to CHECKING THE POSITION OF THE INTAKE CAMSHAFT (CYLINDER HEAD REMOVED) .
- Refer to INSTALLING TORSION SPRINGS .
- Refer to INSTALLING THE SERVOMOTOR FOR THE ECCENTRIC SHAFT (CYLINDER HEAD REMOVED) .
- Refer to REMOVING THE CYLINDER HEAD FROM THE ASSEMBLY JIG .
- Refer to INSTALLING THE EXHAUST TURBOCHARGER (CYLINDER HEAD REMOVED) .