Remove the exhaust turbocharger for the cylinders 1 to 4
WARNING:
Hot surfaces.
Risk of burning!
Risk of burning!
- Perform all work only on components that have cooled down.
CAUTION:
Heavy component.
Heavy components can lead to injury or damage.
Heavy components can lead to injury or damage.
- Remove and install heavy components with the aid of another person/other persons.
NOTE:
RISK OF DAMAGE
Electrostatic discharge.
Damage to or destruction of electrical components.
Electrostatic discharge.
Damage to or destruction of electrical components.
- Leave the electrical components in their original packaging until they are being installed. Only use the original packaging for returning the product. Always package removed components straight away.
- Read and comply with user information on using the associated special tool 12 7 060.
- Only tap the housings of electrical components. Do not tap pins or multi-pin connectors directly.
- Wear electrically conductive clothing and antistatic shoes (with ESD symbol).
- For additional information see: 61 35... NOTES ON ESD (ELECTROSTATIC DISCHARGE) PROTECTION .
NOTE:
TECHNICAL INFORMATION
Collect and dispose of emerging fluids. Observe country-specific waste disposal regulations.
Collect and dispose of emerging fluids. Observe country-specific waste disposal regulations.
NOTE:
TECHNICAL INFORMATION
If the exhaust turbocharger is damaged, it is imperative to observe the additional information.
For additional information see: EXHAUST TURBOCHARGER DAMAGE DUE TO PLUGGED OIL SUPPLY LINES .
If the exhaust turbocharger is damaged, it is imperative to observe the additional information.
For additional information see: EXHAUST TURBOCHARGER DAMAGE DUE TO PLUGGED OIL SUPPLY LINES .
NOTE:
TECHNICAL INFORMATION
For exhaust turbocharger damage: Check the pressure pipes, charge air cooler and intake plenum for foreign matter, damage and correct functionality.
If the oil return line is exchanged, then the connecting pipe to the oil sump must ALWAYS be cleaned, as the connecting pipe can coke.
For exhaust turbocharger damage: Check the pressure pipes, charge air cooler and intake plenum for foreign matter, damage and correct functionality.
If the oil return line is exchanged, then the connecting pipe to the oil sump must ALWAYS be cleaned, as the connecting pipe can coke.
NOTE:
TECHNICAL INFORMATION
Prior to replacing the exhaust turbocharger: Observe the notes on troubleshooting on the exhaust turbocharger.
For additional information see: TROUBLESHOOTING ON THE EXHAUST TURBOCHARGER .
Prior to replacing the exhaust turbocharger: Observe the notes on troubleshooting on the exhaust turbocharger.
For additional information see: TROUBLESHOOTING ON THE EXHAUST TURBOCHARGER .
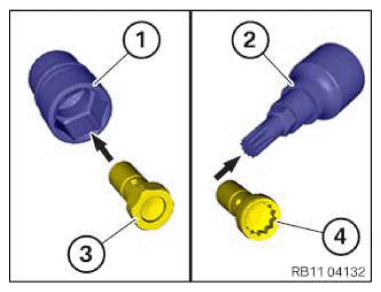
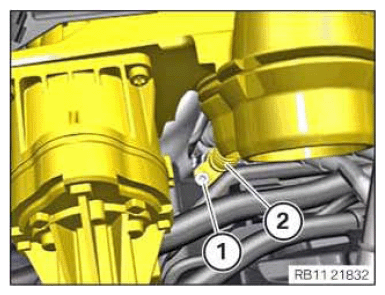
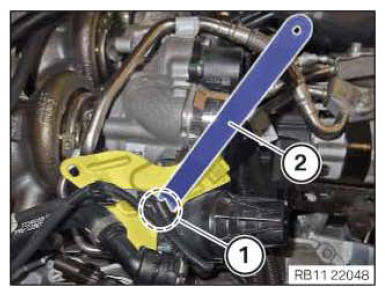
- Determine the screw type and select the appropriate socket wrench:
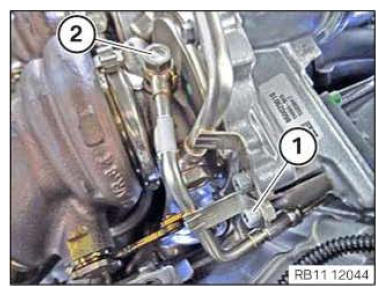
Screw type Appropriate socket wrench Hexagon screw (3) Standard socket wrench (1) Multi-tooth screw (4) Multi-tooth socket wrench (2) - Loosen screw (1).
- Unscrew the banjo bolt (2).
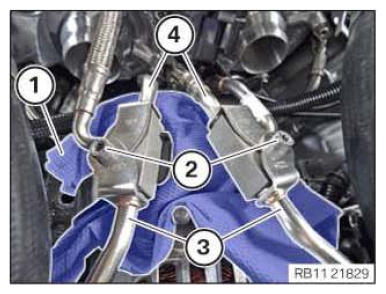
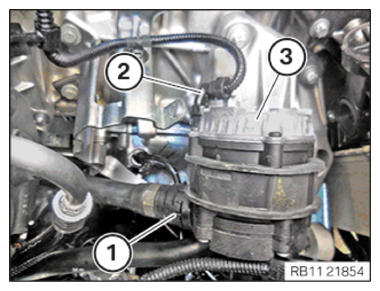
- Position a lint-free rag (1) above the alternator.
- Loosen screws (2).
- Disconnect coolant lines (3).
- Disconnect coolant lines (4).
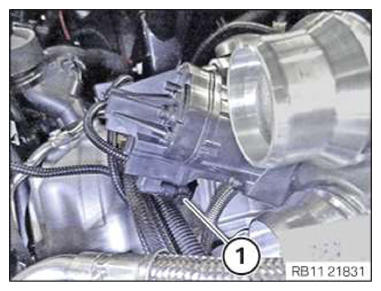
- Unlock plug connection (1) and disconnect.
- Unlock plug connection (1) and disconnect.
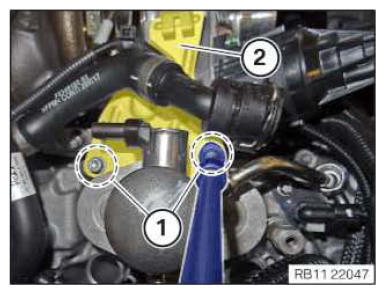
- Loosen the screw (1) on the oil return line (2). Do not completely unscrew the screw (1).
Screw (1) remains in the oil return line (2).
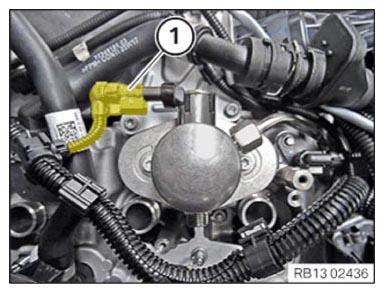
- Unlock plug connection (1) and disconnect.
- Loosen screws in area (1).
- Feed out the bracket (2) in an upwards direction.
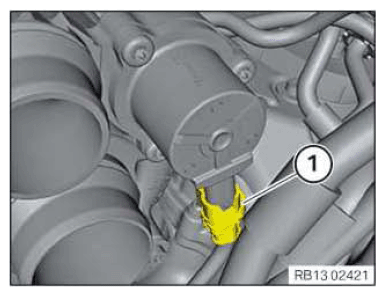
- Release the wiring harness mounting (1) with a standard mounting wedge (2).
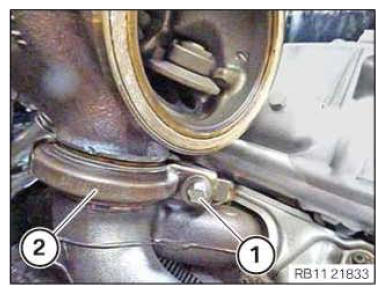
- Loosen screw (1).
- Loosen V-band clamp (2).
- Place oil feed line (1) to the side.
- Make sure that the oil feed line (1) is not damaged.
- Guide out the exhaust turbocharger (2) on the right with the coolant lines and oil return line upwards and remove it.