Installing the steering gear
NOTE:
TECHNICAL INFORMATION
The screws for the steering gear are self-tapping. Therefore, do not cut a thread into the steering gear.
The screws for the steering gear are self-tapping. Therefore, do not cut a thread into the steering gear.
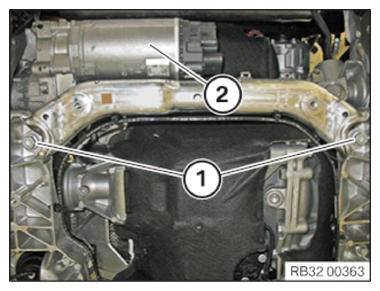
- Install the steering gear (2).
Insert the screws (1) by hand force but do not tighten.
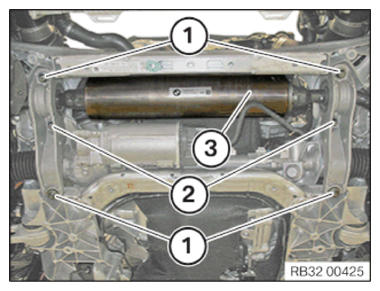
- Install the anti-roll bar (3).
- Insert the screws (1) and (2) by hand force but do not tighten.
NOTE:
TECHNICAL INFORMATION
When assembling, it is essential to observe screwing sequences and tightening torques.
Non-compliance with the regulations can lead to damage.
When assembling, it is essential to observe screwing sequences and tightening torques.
Non-compliance with the regulations can lead to damage.
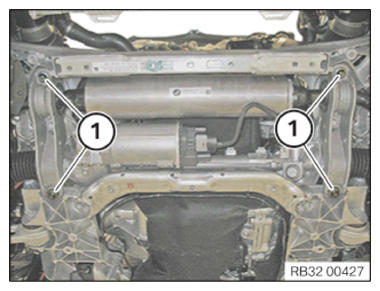
- Tighten the bolts of the steering gear in bolt sequence (1-4).
TIGHTENING TORQUES SPECIFICATION
| Steering gear to front axle support (all-wheel drive vehicles) | ||
|---|---|---|
| M12 Replace screws. |
Joining torque | 60 Nm |
| Angle of rotation | 90° | |
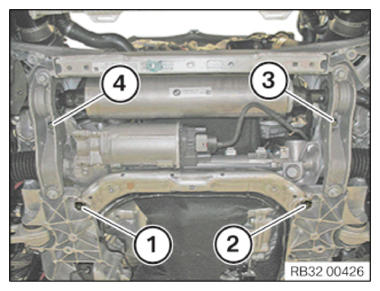
- Tighten the bolts (1) from the anti-roll bar to the front axle support.
TIGHTENING TORQUES SPECIFICATION
| Holder, stabilizer mounting to front axle | ||
|---|---|---|
| M12 Replace screw. |
Joining torque | 100 Nm |
| Angle of rotation | 45° | |
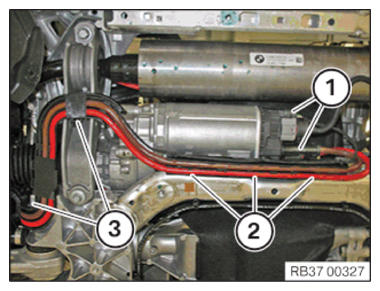
- Clip in wiring harness mounting (3).
Clip in cable duct (2) on front axle support.
Connect the connector (1).
Follow-up work
- Attach the steering gear UNIVERSAL JOINT .
- Install both TIE ROD ENDS
- If installed: fasten the ACTIVE STABILIZER (additional work for ARS).
- Install the THRUST FIELD .
- Install the UNDERBODY PROTECTION of the steering gear or the front thrust field.
- Install the front left and right WHEELS .
- Disconnect all battery GROUND LEADS .
- ACTIVATE the 48 v electrical system.
- Perform CHASSIS ALIGNMENT CHECK .
- Replacement: Commission (INITIALIZATION) of the electromechanical steering
- CHECK the airbag for function.