Install the front prop shaft
CAUTION:
Heavy component.
Heavy components can lead to injury or damage.
Heavy components can lead to injury or damage.
- Remove and install heavy components with the aid of another person/other persons.
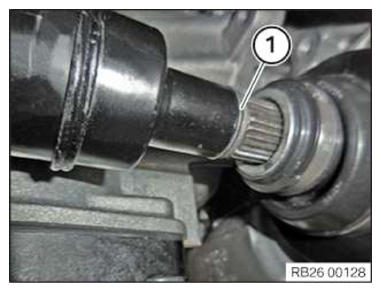
- Replace the O-ring (1) before the installation of the prop shaft.
Parts: O-ring
- With the help of a support person, hold the removed transfer box at the height of the installation position on the transmission.
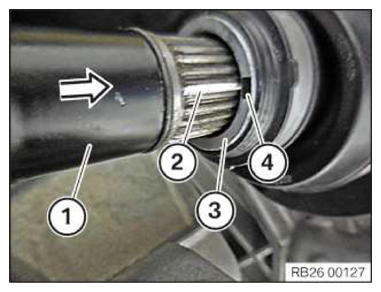
- Attach the prop shaft (1) on the drive flange (3).
- Line up the prop shaft (1) with marks (2) and (4).
- Push the prop shaft (1) into the output flange (3) in the arrow direction all the way to the stop.
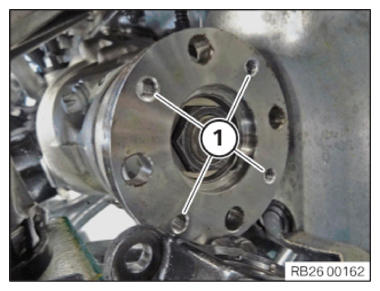
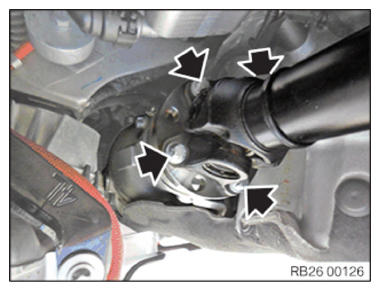
- Before installing the prop shaft on the front axle transmission, all 4 threads (1) in the front axle transmission flange must be freed of possible residue and contaminations and cleaned.
- Replace screws.
Parts: Screws
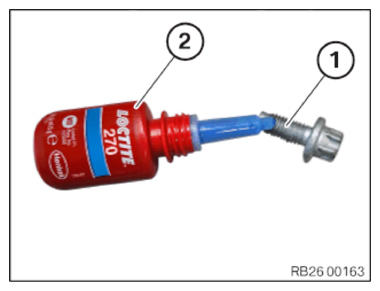
- A drop of Loctite 270 (2) must be given before the screw connection on each thread at the end of the respective screw (1).CONSUMABLE DESCRIPTION
High-strength screw lock, Loctite 270 10 ml, Tube 83 19 2 210 337 NOTE: TECHNICAL INFORMATION
After the screw connection of the front prop shaft, a 30 minute hardening time must be ensured before the vehicle is operated again. - Tighten screws (arrows).
TIGHTENING TORQUES SPECIFICATION
| Prop shaft before the front axle differential | |
| Replace screws. Joining torque and angle of rotation must be observed without fail. |
Joining torque 20 Nm Angle of rotation 45° |