Attach the engine with the automatic transmission (lifting table)
NOTE:
RISK OF DAMAGE
Damage to the transmission.
Damage to the transmission due to unapproved transmission oil.
Damage to the transmission.
Damage to the transmission due to unapproved transmission oil.
- Use only the approved transmission oil.
- Check the transmission oil level after completing the repair.
NOTE:
RISK OF DAMAGE
Damage to the automatic transmission/impeller.
When disconnecting the engine and transmission, the torque converter can become loose! Failure to observe the correct installation positions of the torque converter may lead to damage to the impeller driver.
Damage to the automatic transmission/impeller.
When disconnecting the engine and transmission, the torque converter can become loose! Failure to observe the correct installation positions of the torque converter may lead to damage to the impeller driver.
- Make sure that the torque converter is in the correct installation position before installing the automatic transmission.

- Check installation dimension of torque converter.
See repair instructions for applicable model:
- Removing and installing/replacing TORQUE CONVERTER .
NOTE: TECHNICAL INFORMATION
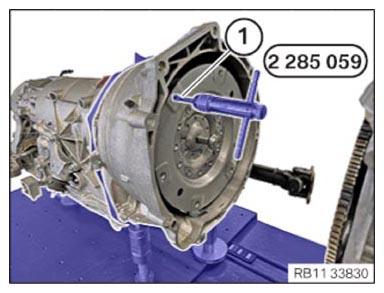
Clean all threads with a screw tap. - Clean all screw threads (1).
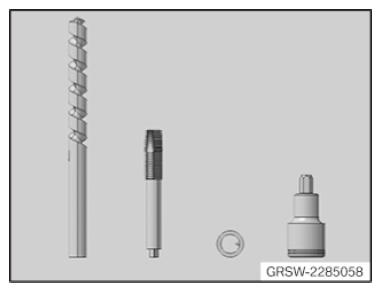
- Use set of special tools 2 285 059.
Description Twist drill Thread cutter M 10x1.5 Deep stop Screw in tool - Assemble tool set.
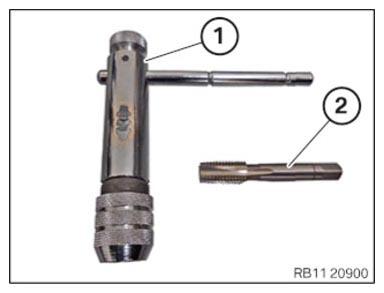
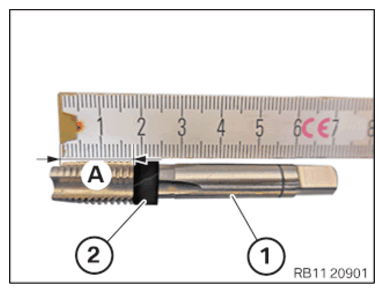
Number Description 1 Tool holder 2 Thread cutter M10X1.5 - Mark screwing depth (A) on the thread cutter (1) from the special tool set 2 285 059
with a commercially available tool (2).TECHNICAL DATA SPECIFICATION
Screw-in depth of thread cutter Screw-in depth 18 mm - Screw in the thread cutter (1) from the set of special tools 2 285 059
up to the screw-in depth.TECHNICAL DATA SPECIFICATION
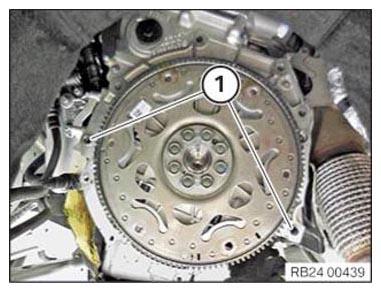
Screw-in depth of thread cutter Screw-in depth 18 mm - Check the fitting sleeves (1) for correct seating and damage and replace if necessary.
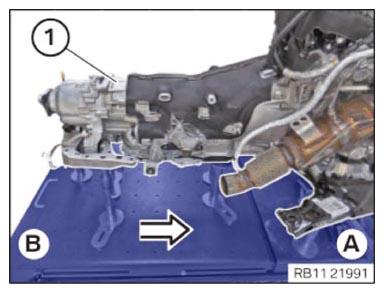
- Push the table top (B) to the table top (A) in the arrow direction.
- Position the automatic transmission (1) on the engine.
- Turn the torque converter until the bore of the torque converter is aligned with the bore of the flywheel.
- Tighten the transmission bolt (1) hand-tight.
- Tighten the transmission bolts (1) hand-tight.
- Tighten the transmission bolt (2) hand-tight.
- Tighten the transmission bolts (1) hand-tight.
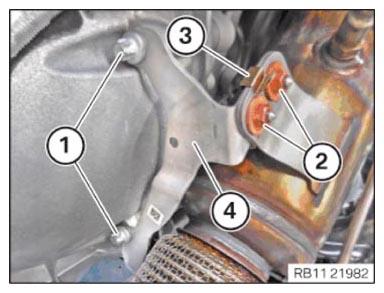
- Guide in the holder (4) for the catalytic converter and position it.
- Tighten the transmission bolts (1) hand-tight.
- Secure clamps (3).
- Replace nuts (2).
Parts: Nuts
- Tighten nuts (2).TIGHTENING TORQUES SPECIFICATION
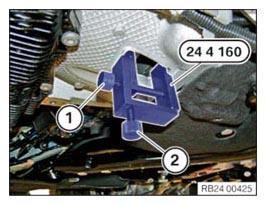
Catalytic converter to holder M8 Nut Replace nut. tightening torque 28 Nm - Release screw (1) and screw (2).
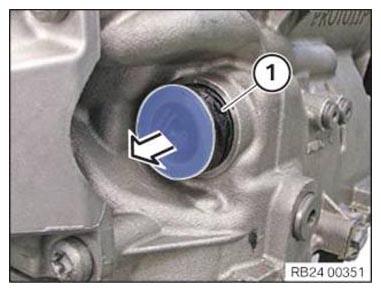
- Remove the special tool 0 494 451 (24 4 160).
- Insert and install the sealing cap (1).NOTE: RISK OF DAMAGE
Damage to the engine.
If the engine is manually rotated in the wrong direction of rotation, the engine can be damaged.- Only rotate the engine manually in the correct direction of rotation: a) clockwise when looking at the damper, or b) counterclockwise when looking at the chain drive, b) applies only if the timing chain is installed in the rear.
- Replace screws.
Parts: Screws
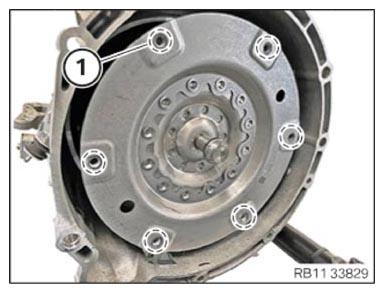
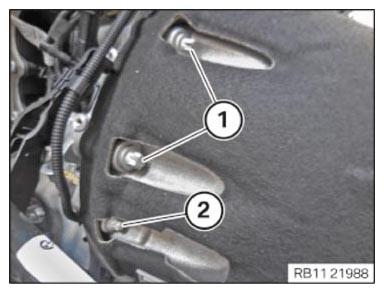
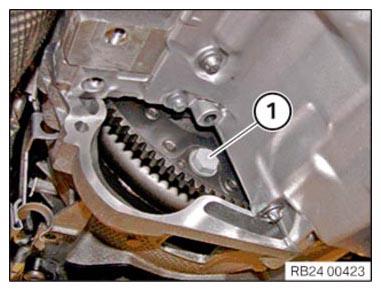
- Turn the engine in the direction of rotation using special tool 0 493 380 (11 6 480) on the vibration damper to tighten all 6 screws (1).
- Tighten all 6 screws (1) of the torque converter using special tool 0 491 667 (24 1 110). TIGHTENING TORQUES SPECIFICATION
Torque converter to flywheel M10
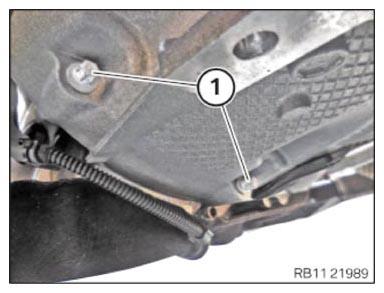
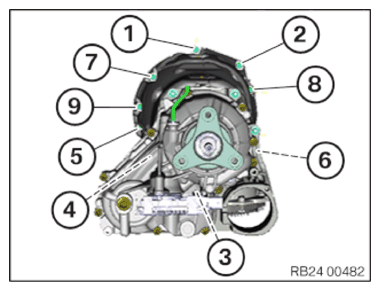
Replace screws.tightening torque 56 Nm - Tighten the transmission bolts in the sequence (1) to (9).TIGHTENING TORQUES SPECIFICATION
Transmission to engine M8 Tightening torque 19 Nm M12 Tightening torque 66 Nm NOTE: RISK OF DAMAGE
Improper routing of cables and wiring harnesses.
Trapped, crushed or damaged cables may cause short circuits and malfunctions.- Route all cables without abrasions, do not trap and crush.
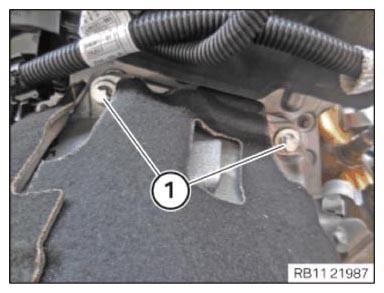
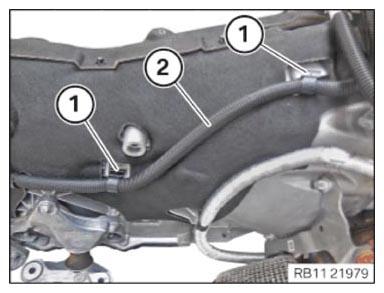
- Insert and position transmission wiring harness (2).
- Secure clamps (1).
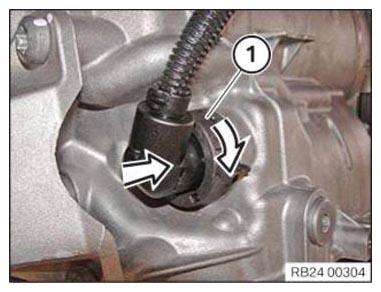
- Guide out and remove the special tool 0 494 213 (24 2 390)
from the sealing sleeve in the arrow direction.
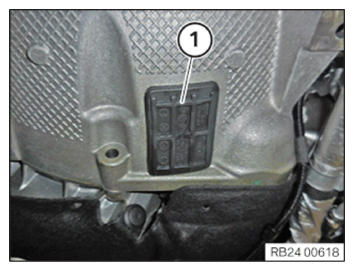
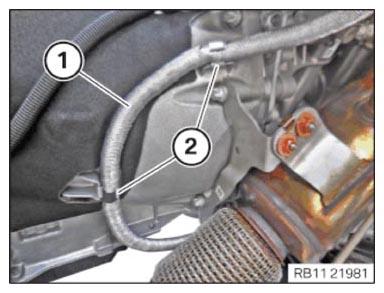
- Slide connector (1) in the arrow direction and lock it by turning it.CAUTION: Improper routing of the positive battery cable.
Risk of short circuits!- Route the positive battery cable without abrasions and do not trap.
- Secure the positive battery cable (1) at the clamps (2).
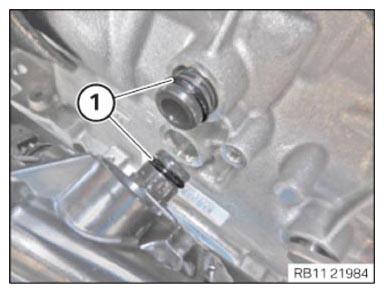
- Replace the sealing rings (1).
Parts: Sealing ring
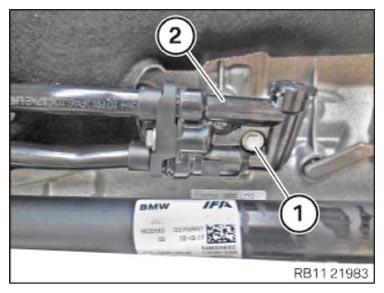
- Feed in and install the transmission oil line (2).
- Tighten down screw (1).TIGHTENING TORQUES SPECIFICATION
Transmission oil line to transmission M6x25
Replace the sealing ring.tightening torque 8 Nm - Feed in and install the holder (2) for the transmission oil lines in the marked area.
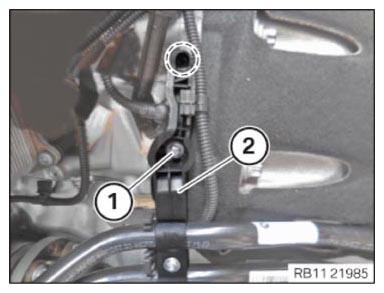
- Tighten down screw (1).TIGHTENING TORQUES SPECIFICATION
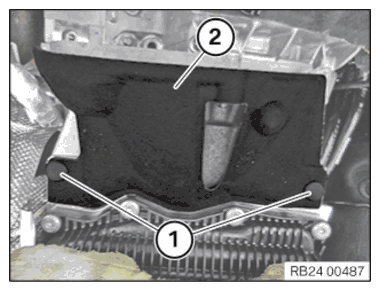
Holder on end cover M6X16 Tightening torque 8 Nm - Feed the acoustic cover (2) in and install.
- Feed in and install the expanding rivet (1).