Installing the drive belt for the starter motor generator
Drive belt for the starter motor generator

NOTE:
RISK OF DAMAGE
Wrong setting of the drive belt.
Reduced service life of drive belt, subsequent damage.
Wrong setting of the drive belt.
Reduced service life of drive belt, subsequent damage.
- Check the setting of the belt tensioner in the adjustment range after each removal/installation or replacement of the drive belt. The marks must be aligned.
NOTE:
TECHNICAL INFORMATION
If the drive belt is reused: Mark the direction of rotation and reinstall the drive belt in same direction of rotation.
If the drive belt is reused: Mark the direction of rotation and reinstall the drive belt in same direction of rotation.
NOTE:
TECHNICAL INFORMATION
Replace drive belt if it is contaminated with coolant and oil residue.
Replace drive belt if it is contaminated with coolant and oil residue.
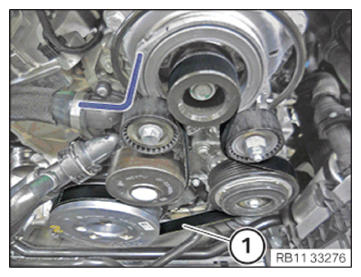
- Feed in the drive belt (1) for the starter motor generator and position it.
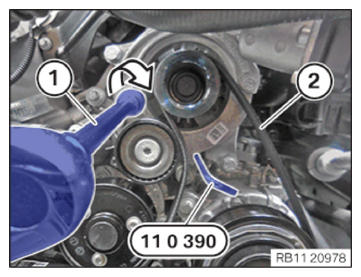
- Increase the preload on the tensioning device using commercially-available tools (1), in the arrow direction.
- Feed out the special tool 0 496 268 (11 0 390)
from the belt tensioner out and remove it.
The drive belt (2) for the starter motor generator must be correctly installed.
Check
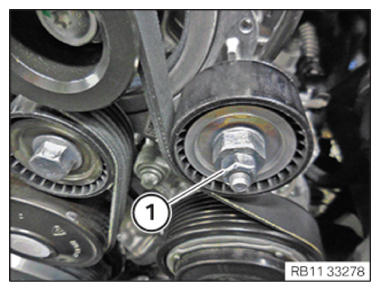
- Check if the marking (1) of the belt tensioner aligns in adjustment range (2).
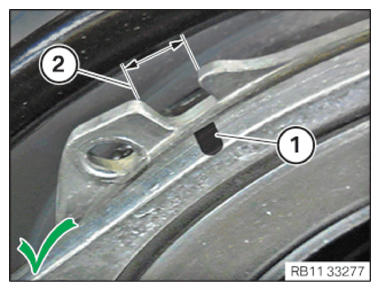
Result
» Mark (1) of the belt tensioner is aligned within the adjustment range (2).
Measure
- No measures required.
Check
- Check if the marking (1) of the belt tensioner aligns in adjustment range (2).
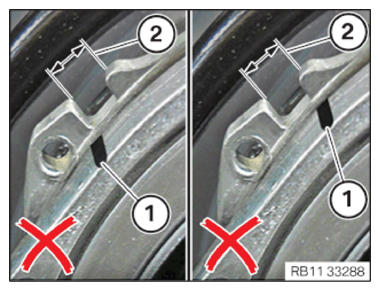
Result
» Mark (1) of the belt tensioner is not aligned within the adjustment range (2).
Measure
- Set the tension of the drive belt for the starter motor generator.
- Release the nut (1) by 90°.
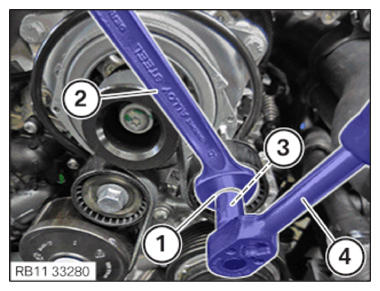
- Turn eccentric (1) with a commercially-available tool (2) in the arrow
direction such that the mark (3) aligns in the adjustment range.
- Counter support the eccentric (1) with a conventional tool (2).
- Tighten the nut (3) with a conventional tool (4).

TIGHTENING TORQUES SPECIFICATION
| Lock nut of the tensioning device on eccentric | ||
| M8 | tightening torque | 22 Nm |
Follow-up work
- Refer to INSTALLING CHARGE AIR LINE .
- Refer to INSTALLING BOTTOM CLEAN AIR PIPE .
- Refer to INSTALLING CLEAN AIR PIPE, TOP .
- Refer to INSTALLING THE INTAKE FILTER HOUSING (TENSION STRUT REMOVED ON SHOCK TOWER) .
- Refer to INSTALLING FAN COWL .
- Refer to INSTALLING THE REAR TOP CROSS CONNECTION .
- Refer to INSTALLING FRONT CROSS CONNECTION .
- Refer to INSTALLING BOTH FRONT-END STRUTS .
- Refer to INSTALLING THE COVER ON THE LEFT AND RIGHT IN THE ENGINE COMPARTMENT AT THE TOP .
- Refer to INSTALLING ACOUSTIC COVER .