Removing all the engine ventilation lines
WARNING:
Hot surfaces.
Risk of burning!
Risk of burning!
- Perform all work only on components that have cooled down.
WARNING:
Hot fluids.
Risk of scalding!
Risk of scalding!
- Conduct all work in the vehicle wearing appropriate personal protective equipment only.
CAUTION:
Materials harmful to health.
Contact with fluids harmful to health!
Contact with fluids harmful to health!
- Note and follow safety instructions on containers.
- Conduct all work in appropriate personal protective equipment only.
NOTE:
TECHNICAL INFORMATION
Immobilization period-long fill of coolant!
Do not reuse used coolant.
When replacing and removing components which rely on the corrosion protection effect of the coolant, it is essential to change the coolant. The cooling system must therefore be emptied and refilled.
In the case of other removal work involving the draining of part quantities of coolant, the coolant level must be topped up with new coolant.
NOTE:
TECHNICAL INFORMATION
Notes on work at the cooling system form the basis of these repair instructions and must be complied with at all times.
For additional information see: INSTRUCTIONS FOR REPAIR WORK ON COOLING SYSTEM
Notes on work at the cooling system form the basis of these repair instructions and must be complied with at all times.
For additional information see: INSTRUCTIONS FOR REPAIR WORK ON COOLING SYSTEM
NOTE:
TECHNICAL INFORMATION
Collect and dispose of emerging fluids. Observe country-specific waste disposal regulations.
Collect and dispose of emerging fluids. Observe country-specific waste disposal regulations.
Preliminary work
- Refer to DISCONNECTING ALL BATTERY GROUND LEADS .
- Refer to REMOVING THE COVER OF THE RIGHT DME CONTROL UNIT .
- Refer to REMOVING THE COVER PANEL OF THE LEFT DME CONTROL UNIT .
- Refer to REMOVING THE ACOUSTIC COVER .
- Refer to REMOVING THE COVER OF THE RIGHT DME CONTROL UNIT .
- Refer to REMOVING THE CONTROL UNIT BRACKET FOR CYLINDERS 1 TO 4 .
- Refer to REMOVE TOP CLEAN AIR PIPE .
- Refer to REMOVING THE CONTROL UNIT BRACKET FOR CYLINDERS 5 TO 8 .
- Refer to REMOVE COOLANT EXPANSION TANK .
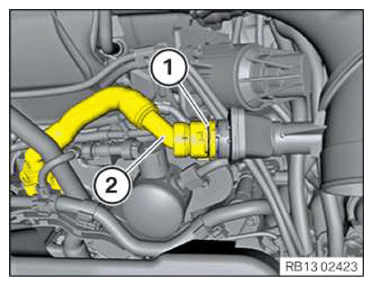
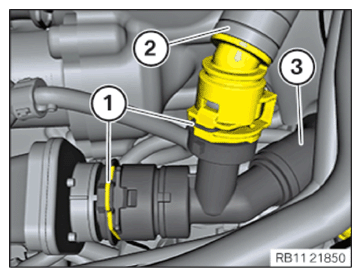
- Unlock the retaining clip (1) upwards using a suitable screwdriver.
- Slide engine ventilation line (2) downwards to the side.
- Guide out and remove the cover (3).
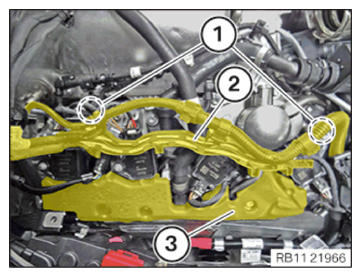
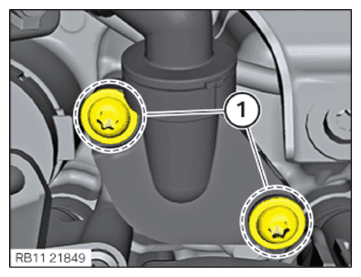
- Loosen screws (1).
- Press the wiring harness (2) to the side.
- Loosen screws (1).
- Feed out the engine ventilation line (2) and remove.
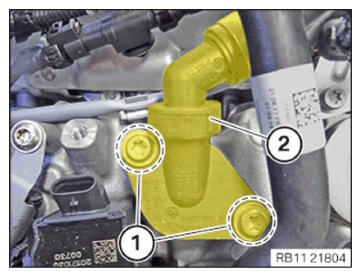
- Remove retaining clip (1).
- Feed out and remove the intake pipe (2).
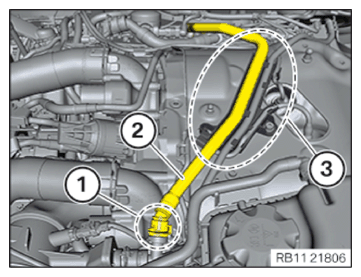
- Ensure that the retaining clip (1) is unlocked.
- Unclip the intake pipe (2) from the holder in the area (3).
- Unlock the retaining clips (1) in an upward direction, using a suitable screwdriver.
- Slide the intake pipe (2) downwards to the side.
- Slide engine ventilation line (3) downwards to the side.
- Feed out the engine ventilation line (3) and remove.
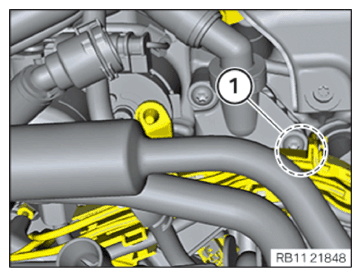
- Slightly press down the wiring harness in the area (1).
- Loosen screws (1).
- Feed out the engine ventilation line and remove.