Install the HSR actuator
NOTE:
TECHNICAL INFORMATION
Conduct the following operation with the assistance of a second person.
Conduct the following operation with the assistance of a second person.
- Position the HSR actuator under the rear axle support.
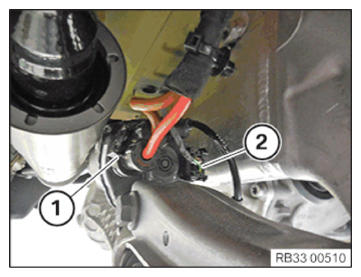
- Connect connectors (1) and (2) lock.
- Position the HSR actuator with the journal in bore hole on the rear axle support.
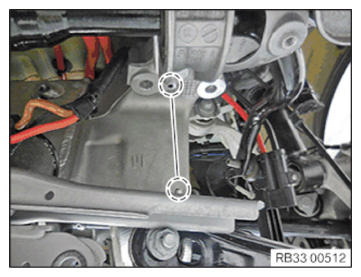
- Replace screws (2).
Parts: Screws
- Tighten the screws (2) on the HSR actuator (1).TIGHTENING TORQUES SPECIFICATION
HSR actuator to rear axle support (top) M14
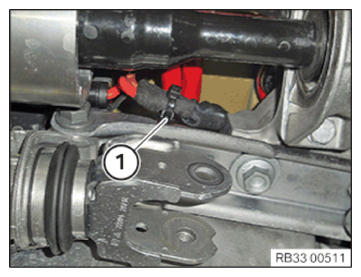
Replace screws.Tightening torque 165 Nm - Replace screw (3) and nut (4).
Parts: Bolt, nut
- Insert the screw (3).
- Tighten nut (4).TIGHTENING TORQUES SPECIFICATION
HSR actuator to rear axle support (bottom) M12
Replace screw and nut.Jointing torque 100 Nm Angle of rotation 90° - Fasten the wiring harness (1) onto the HSR actuator.NOTE: The following work step(s) is/are to be carried out if the specified component(s) is/are fitted.NOTE: Perform the operations on the left and right side.
- Replacement:
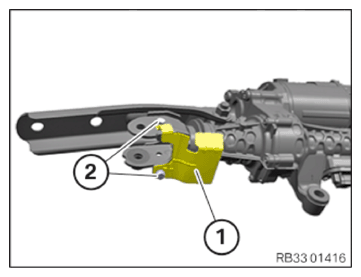
Remount heat protection (1) on the new HSR actuator.
Loosen screws (2).
Remove heat protection (1) and position it on the new HSR actuator.
Tighten the screws (2).
TIGHTENING TORQUES SPECIFICATIONHeat protection to HSR actuator M6
Replace screw.Tightening torque 8 Nm

Follow-up Work
- If installed: install the torsion struts MOUNTING BLOCK .
- Install the left and right track CONTROL ARM .
- Install EXHAUST SYSTEM .
- Install the left and right camber control arm COVER .
- Install the left and right rear WHEEL .
- ENCODE The HSR actuator.
- Perform chassis ALIGNMENT CHECK .