Installing headlining (with SA403 glass roof)
Prerequisite
Glass roof is open.
The front seats are at the lowermost position.
The front seat backrests are adjusted fully to the rear.
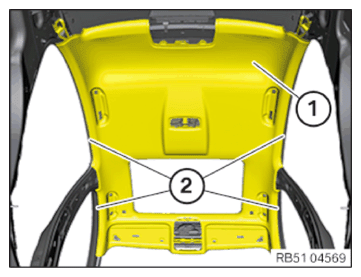
- Lift headlining (1) with an auxiliary person through the opening for the windscreen in the vehicle.
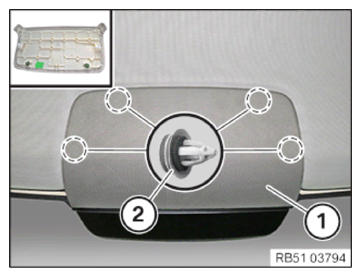
- Guide the headlining (1)
in at the respective edge protection (2)
.
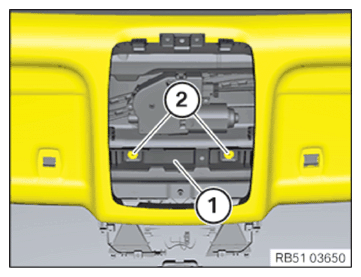
- Secure the frame (1) to the roof using the clips (2) .
- If necessary, clip in the cable clip into the frame (1)
.
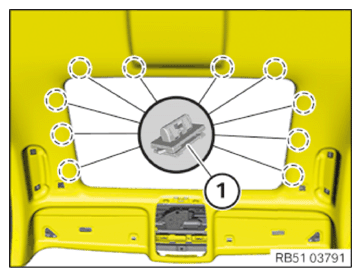
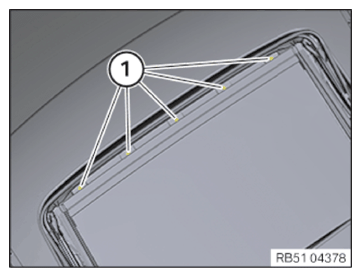
- Clip in the headlining using the clips (1)
.
- Secure the frame (1)
to the roof using the clips (2)
.
- Clip in trim (1)
using clips (2)
.
- Tighten down screw (1) .
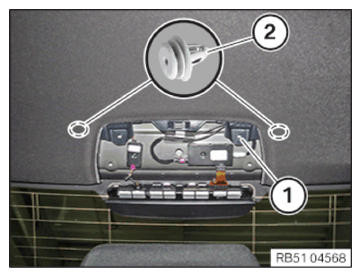
TIGHTENING TORQUES SPECIFICATION
| Headlining | ||
|---|---|---|
| Tightening torque | 2.5 Nm | |

- Tighten the screws (1) .
TIGHTENING TORQUES SPECIFICATION
| Headlining to panorama glass roof | ||
|---|---|---|
| Tightening torque | 1.2 Nm | |
Follow-up Work
- Replace the SPACER .
- Check the instrument panel expanding FOAM TAPE .
- Check windscreen COVER .
- Check the cowl panel SOUND INSULATION .
- Install WINDSCREEN .
- Secure front HEADLINING .
- Install all GRAB HANDLES .
- Install both c-pillar TRIM PANELS .
- Partially install top left and right b-pillar TRIM PANELS
- Install rear interior roof LIGHT .
- Connect rain-light-solar-condensation sensor CONNECTOR
- Install the KAFAS camera with the integrated CONTROL UNIT .
- Install the interior MIRROR .
- Install the interior mirror COVERS .
- Install roof FUNCTION CENTER (FZD).
- Install the left and right SUN VISORS
- Install both vanity mirror LIGHTS .
- Install left and right sun visor counter SUPPORTS .
- Install the right hands-free MICROPHONE .
- Install left hands-free MICROPHONE .
- Install the left and right a-pillar TRIM PANEL .
- Install the left and right roof TRIM STRIP .
- Install cowl panel COVER .
- Install left and right WIPER ARM .
- Install the rear right engine compartment COVER .
- Install the rear left engine compartment COVER .
- CALIBRATE KAFAS camera.