Install high-voltage battery unit
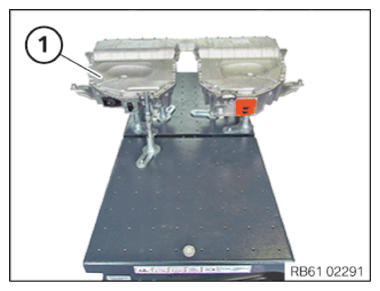
- Position the lifting table with the high-voltage battery unit (1) under the vehicle and carefully lift it.
- Do not completely lift in the high-voltage battery unit.NOTE: RISK OF DAMAGE
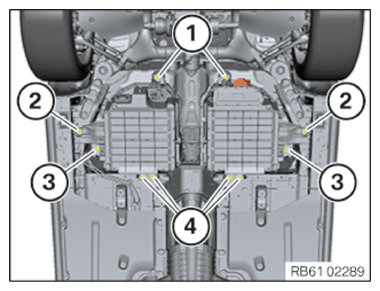
Not installing the washer can lead to deformation of the body.- Ensure that the installation of the washer is checked by a second person and documented in the vehicle records together with the potential equalization.
- Insert washers for the screws (4) between body and holder for high-voltage battery unit.
- Feed in the screws (4).
- Levy high-voltage battery unit completely.
- Tighten the screws (4).TIGHTENING TORQUES SPECIFICATION
Front holder to body M8x21 Tightening torque 30 Nm WARNING: Potential equalization in high-voltage system.
Mortal hazard if the potential equalization screw connection is not correct!- Observe the safety requirements for the potential equalization screw connection.
- Clean contact faces and have then checked by a second person.
- Tighten the screws/nuts for potential equalization with torque; have a second person check the torque.
- Correct execution of these tasks must be documented in the vehicle records by both persons.
- Tighten the screws for potential equalization (3).TIGHTENING TORQUES SPECIFICATION
Holder, side, to body M10x38
Replace screw.Tightening torque 80 Nm - Tighten down screws (1).TIGHTENING TORQUES SPECIFICATION
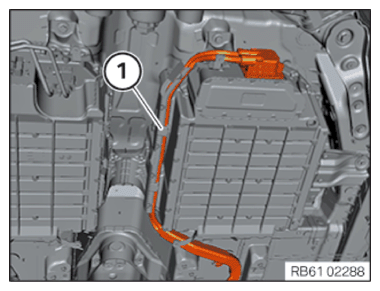
Rear holder to body M12x26 Tightening torque 96 Nm - Tighten the screws (2).TIGHTENING TORQUES SPECIFICATION
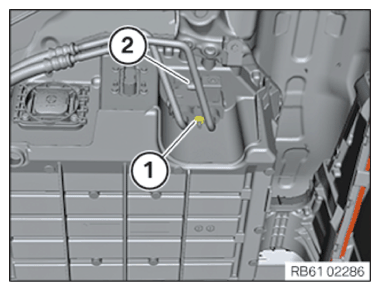
Crash holder to body M8x30 Tightening torque 30 Nm - Clip in high-voltage cable (1).
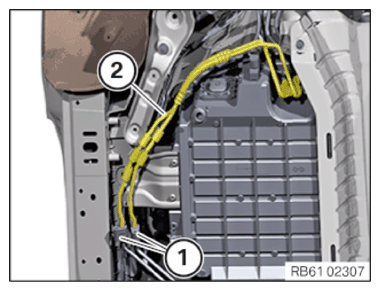
- Replace the sealing rings of refrigerant line (2).
- Insert and tighten the refrigerant line (2).TIGHTENING TORQUES SPECIFICATION
Refrigerant line M6 Tightening torque 13 Nm - Tighten the refrigerant line (1).TIGHTENING TORQUES SPECIFICATION
Refrigerant line M6 Tightening torque 13 Nm - Connect connector (2).
- Connect high-voltage connector (2).
- Tighten the screws for tension relief (1).TIGHTENING TORQUES SPECIFICATION
Tension relief Tightening torque 8 Nm

Follow-up work
- Completely install the PROP SHAFT (plug-in - rear flexible disc).
- Install the HEAT SHIELDS
- Install the complete EXHAUST SYSTEM .
- Install TORSION STRUT
- Install left and right TANK COVER .
- Install the rear axle COVER .
- Install the tunnel connect SUPPORTS
- Install the transmission on the side UNDERBODY PLANKING .
- Install rear UNDERBODY PROTECTION .
- Activate HIGH-VOLTAGE SYSTEM .
- Install right luggage compartment trim panel FLAP .
- Evacuate the AIR CONDITIONING
- Fill the AIR CONDITIONING