Disassemble exterior mirrors
NOTE:
Description is for left component only. Procedure on the right side is identical.
Preliminary works
- Remove the mirror GLASS .
- Remove the exterior mirror PROTECTIVE CAP .
- Remove the exterior mirror adjustment DRIVE .
- Remove exterior rearview mirror RETAINING RING .
- Remove the top view CAMERA .
- Remove the mirror triangle COVER .
- Remove the exterior MIRROR .
NOTE:
RISK OF DAMAGE Electrostatic discharge. Damage to or destruction of electrical components.
- Leave electrical components in original packaging until just before they are installed. Use the original packaging only for any return shipments. Always package removed components straight away.
- Read and comply with user information on using the associated special tool 12 7 060.
- Only touch the housings of electrical components. Do not touch pins or multipin connectors directly.
- Wear electrically conductive clothing and antistatic shoes (with ESD symbol).
- For additional information see: 61 35... NOTES for ESD protection (electrostatic discharge)
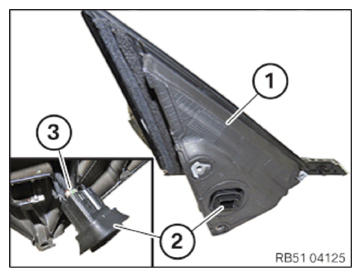
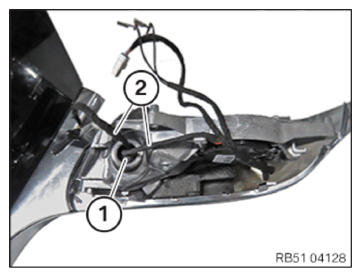
- Remove sound insulation (1).
- Pull out connector housing (2).
- Unpin connector (3) from the connector housing (2).
The number of connectors (3) varies depending on the equipment specification.
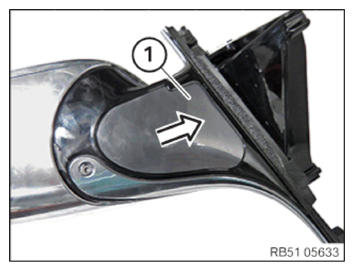
Remove the cover on the mirror base
- Move the cover (1) in direction of arrow and remove.
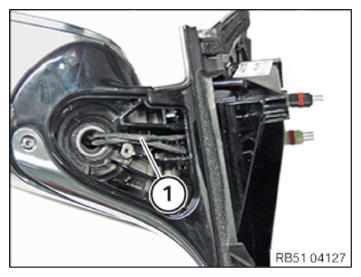
- Carefully feed out cables (1) individually.
The pins on the cables (1) must not be damaged.
The number of cables (1) varies depending on the equipment specification.
- Pull out the foam insert (1) and the cable (2) from the exterior rearview mirror.
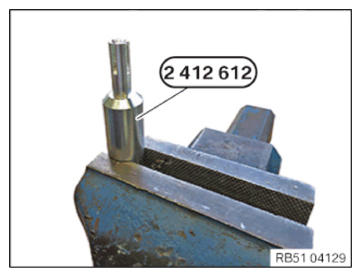
- Clamp special tool 2 412 612
into the outside of the vice.
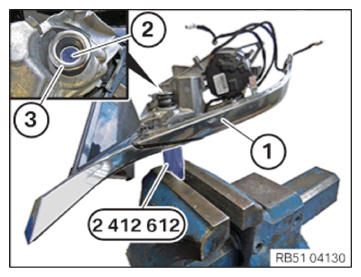
- Set up exterior mirror (1) from the special tool 2 412 612.
- Screw in countersunk screw (2) into the special tool 2 412 612
and brace the sleeve (3).
- To prevent swarf entering the joints: mask exterior rearview mirror with adhesive tape.
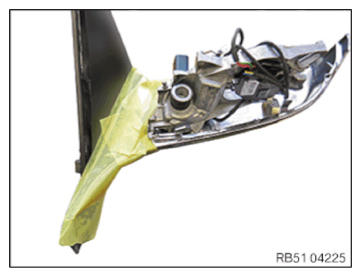
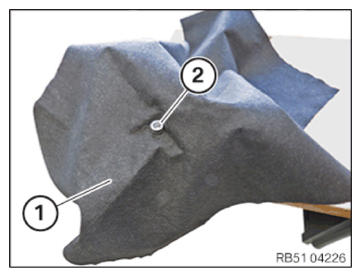
- To prevent swarf entering: cover the exterior rearview mirror with a cloth (1).
The cloth (1) must measure at least 70 x 70 cm and have an opening in the center measuring maximum 3 x 3 cm.
- Position the cloth (1) over the spring (2) of the exterior rearview mirror.
- Cover exterior rearview mirror with the prepared cloth (1).
- Ask an auxiliary person to secure the exterior mirror.
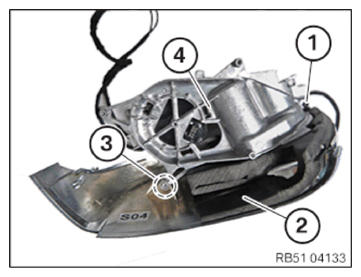
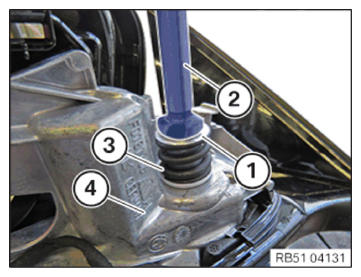
- Drill out the sleeve (1) with the countersink (2).
The spring (3) has only a slight preload.
NOTE:
The exterior rearview mirror is shown here without cloth for clarity.
- Remove all swarf with the vacuum cleaner.
- Remove cloth from the exterior rearview mirror.
- Remove the spring (3) and the upper section (4) of the exterior rearview mirror.
Disassemble exterior mirrors
- Follow repair instructions!
CAUTION:
Sharp edges on the drilled out component.
Danger of injury!
Danger of injury!
- Do not touch sharp edges.

- Make sure there is no swarf on the exterior rearview mirror.
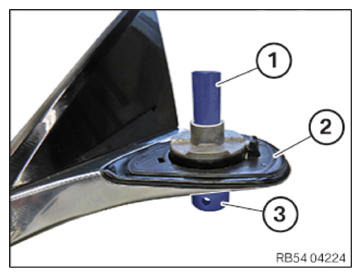
- Release countersunk screw (1).
- Remove the lower section (2) of the exterior rearview mirror.
- Clean swarfs from the threads in special tool 2 412 612.
- Remove the sleeve (3) from the lower section (2) of the exterior rearview mirror.
- If necessary, press together the burr at the top of the sleeve (3) so that it is possible to pull out the sleeve (3) from the lower section (2) of the exterior rearview mirror.
- If sleeve (1) is jammed, position a suitable tool (3) (e.g. 22-mm wrench socket) under the sleeve (1).
- Remove the sleeve (1) from the exterior mirror (2) using a rubber mallet.
- Loosen screw (1).
- Detach cover (2) in area (3) and thread out from mirror housing (4).