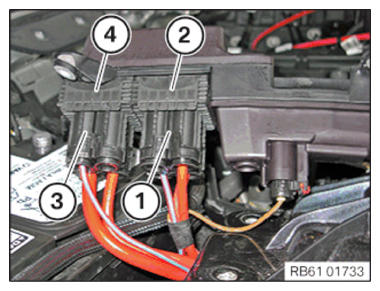
Install the front power distribution box
- Connect connector (1) and close the lock (2).
- Connect connector (3) and close the lock (4).
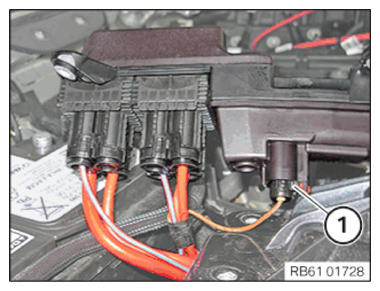
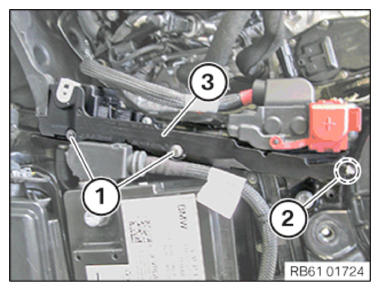
- Connect connectors (1) and lock.
- Feed in the power distribution box (3) in a downwards direction.
- Tighten down screw (2).TIGHTENING TORQUES SPECIFICATION
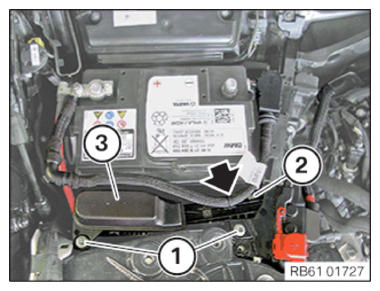
Front power distribution box Screw TS4x16 Tightening torque 2.6 Nm - Tighten the screws (1).TIGHTENING TORQUES SPECIFICATION
Front power distribution box M8x35 screw Tightening torque 28 Nm - Fasten the cable clip (arrow).
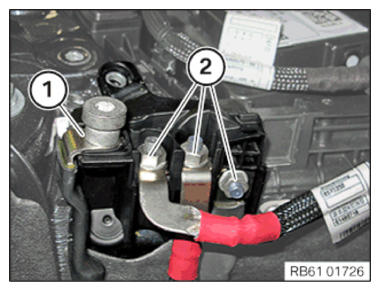
- Feed in the accompanying cable and tighten the nut (1).TIGHTENING TORQUES SPECIFICATION
Auxiliary terminal for jump starting Flange nut M8 Tightening torque 19 Nm - Feed in the accompanying cable and tighten the nut (2).TIGHTENING TORQUES SPECIFICATION
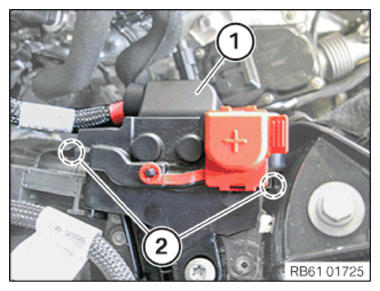
Positive battery cable Positive pole screw Tightening torque 15 Nm - Feed in the cover (1) in a downwards direction.
- Check the detents (2) are seated correctly.
- Feed in the power distribution box sealing frame (3) in a downwards direction.
- Tighten the screws (1).TIGHTENING TORQUES SPECIFICATION
Front power distribution box sealing frame Bolt RF5x25 Tightening torque 2.5 Nm - Check that the detent (2) is fitted correctly.
Follow-up work
- Install the right shock tower TENSION STRUT .
- Install windshield panel COVER .
- Install left and right WIPER ARM .
- Install the rear left engine compartment COVER
- Install the rear right engine compartment COVER .
- Reconnect all battery GROUND LEADS .