Installing the oxygen sensor monitor
Preparing oxygen sensor
NOTE:
TECHNICAL INFORMATION
Grease the threads of new oxygen sensors thinly and evenly.
For oxygen sensors that are reused, the following should be observed:
Thinly and evenly grease the oxygen sensor on the thread only. Do not clean the part of the oxygen sensor that does not protrude into the exhaust line (sensor ceramics) and do not grease.
For additional information see: OVERVIEW OF CONSUMABLES (BMW PARTS CATALOGUE) .
NOTE:
TECHNICAL INFORMATION
For additional information see: OVERVIEW OF CONSUMABLES (BMW PARTS CATALOGUE) .
For additional information see: OVERVIEW OF CONSUMABLES (BMW PARTS CATALOGUE) .
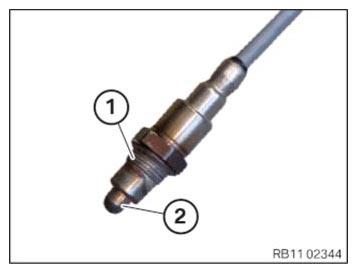
- Prepare the oxygen sensor.
Do not damage the sensor ceramics.
(1) = Thread
(2) = Sensor ceramics
NOTE:
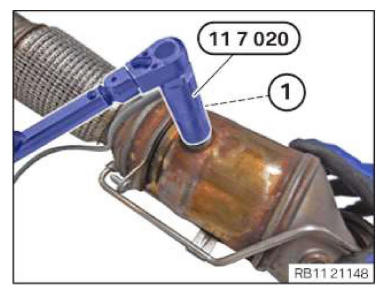
The cable of the oxygen sensor monitor is gray. The installation location of the oxygen sensor monitor is behind the catalytic converter.
- Insert the oxygen sensor monitor (1) and install it.
- Tighten the oxygen sensor monitor (1) with the special tool 0 491 074 (11 7 020) .
TIGHTENING TORQUES SPECIFICATION
| Oxygen sensor monitor | ||
| M18x1.5 | Tightening torque | 50 Nm |
Follow-up work
- Refer to INSTALLING CATALYTIC CONVERTER .
- Refer to INSTALLING THE COMPLETE EXHAUST SYSTEM .
- Refer to INSTALLING THE CONNECTING SUPPORTS ON THE TUNNEL .
- Refer to INSTALLING THE THRUST FIELD .
- Refer to INSTALLING LAMBDA OXYGEN SENSOR .
- Refer to INSTALLING ACOUSTIC COVER AT REAR .
- Refer to INSTALLING ACOUSTIC COVER .
- Refer to INSTALLING THE FRONT HOOD SEAL AT THE REAR .