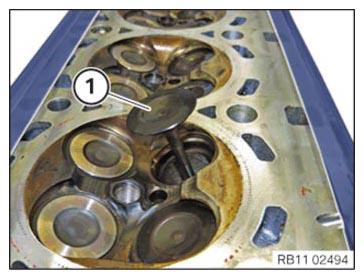
Install all valves
NOTE:
RISK OF DAMAGE
Contaminant or foreign body.
Contamination can result in malfunctions, loss of function or leaks.
Contaminant or foreign body.
Contamination can result in malfunctions, loss of function or leaks.
- Adhere to the utmost cleanliness.
- Protect components from contamination e.g. by covering.
- Close off line connections with seal plugs.
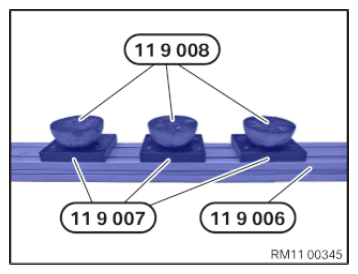
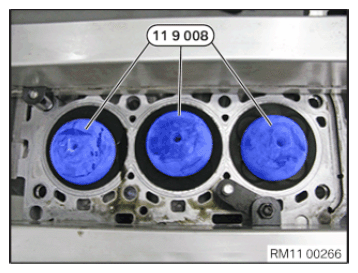
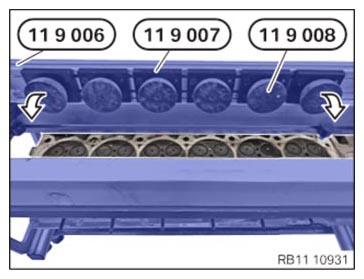
- Position the special tools 0 494 371 (11 9 006), 0 494 372 (11 9 007)
and 0 494 373 (11 9 008)
on the cylinder head in the center in arrow direction.
- Turn round special tool 0 494 371 (11 9 006) and insert as shown.
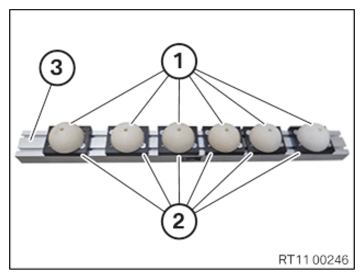
- Lock the special tools 0 494 370 (11 9 005) in arrow direction.
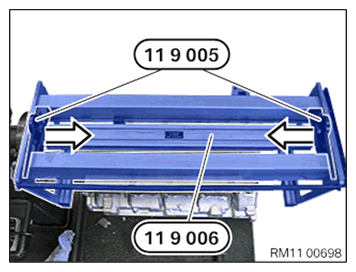
- Shift the special tools 0 494 370 (11 9 005)
in arrow direction via the edges of the special tools 0 494 371 (11 9 006)
and lock them.
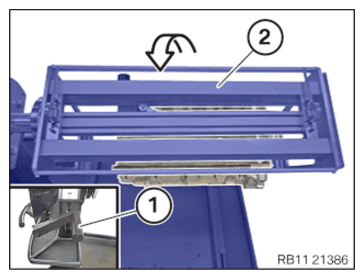
- Turn the special tool 0 494 366 (11 9 001) (2) on the crank (1) by 180° in arrow direction.
Follow-up work
- Refer to INSTALLING VALVE STEM SEALS .
- Refer to INSTALLING ALL VALVE SPRINGS .
- Refer to INSTALLING ALL ROLLER CAM FOLLOWERS .
- Refer to INSTALLING EXHAUST CAMSHAFT (CYLINDER HEAD REMOVED) .
- Refer to INSTALLING THE ECCENTRIC SHAFT (CYLINDER HEAD REMOVED) .
- Refer to INSTALLING THE SERVOMOTOR FOR THE ECCENTRIC SHAFT (CYLINDER HEAD REMOVED) .
- Refer to INSTALLING THE INTAKE CAMSHAFT (CYLINDER HEAD REMOVED) .
- Refer to CHECKING THE INTERMEDIATE LEVER CLASSIFICATION .
- Refer to INSTALLING ALL INTERMEDIATE LEVERS .
- Refer to INSTALLING ALL GATES .
- Refer to ADJUSTING THE ECCENTRIC SHAFT TO THE MINIMUM LIFT (CYLINDER HEAD REMOVED) .
- Refer to CHECKING THE POSITION OF THE INTAKE CAMSHAFT .
- Refer to INSTALLING THE TORSION SPRINGS .
- Refer to REMOVING THE CYLINDER HEAD FROM THE ASSEMBLY JIG .
- Refer to INSTALLING THE EXHAUST TURBOCHARGER (CYLINDER HEAD REMOVED) .