Transmission, Disassembling And Assembling: Removing
-- Drain the ATF. Refer to ATF, DRAINING AND FILLING .
-- Drain the transmission fluid. Refer to TRANSMISSION FLUID, DRAINING AND FILLING .
-- If equipped, remove the all-wheel drive clutch. Refer to ALL-WHEEL DRIVE CLUTCH, REMOVING AND INSTALLING .
-- Remove the dual clutch. Refer to DUAL CLUTCH, REMOVING AND INSTALLING .
-- Turn the transmission on the Gearbox Support: T40206 180°.
Vehicles without self-locking center differential
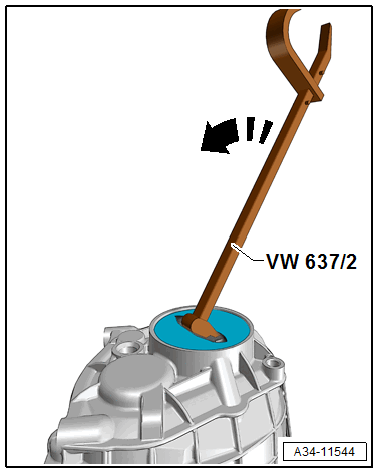
-- Remove the end cover to do so chisel the center of the cover and remove using the Puller - Grease Cap: VW637/2 as shown.
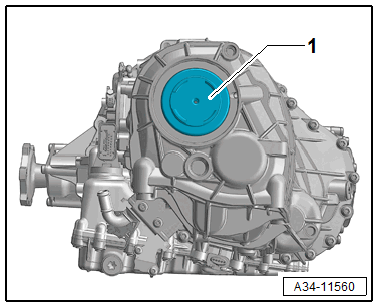
-- Remove the oil catch tray -1-.
Vehicles with self-locking center differential
-- Removing the self-locking center differential. Refer to the appropriate Service Information .
-- Remove the oil catch tray -1-.
Continuation for all vehicles
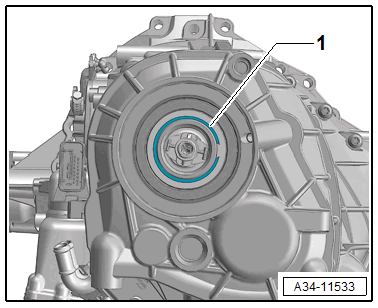
-- Remove the circlip -1-.
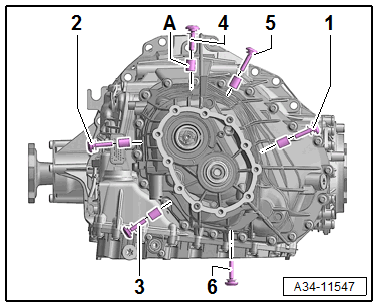
-- Remove the bolts -1 to 6-.
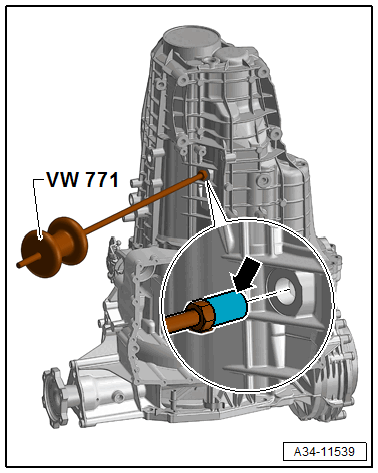
-- Remove the five centering bushings -arrow- using the Slide Hammer Set: VW771 .
Tip:
- Bolt -6- does not have a centering bushing.
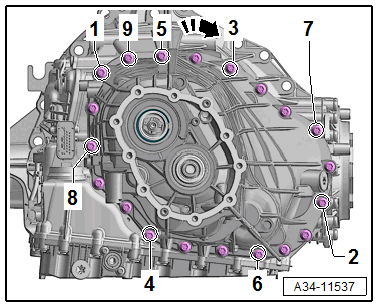
-- Remove the bolts for the transmission housing.
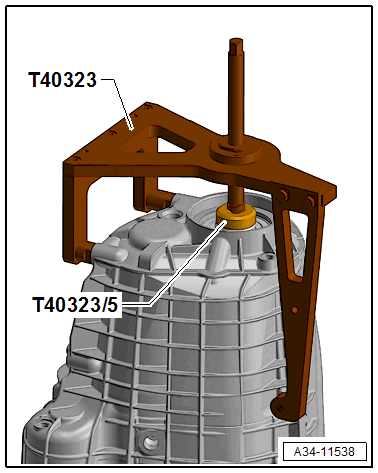
-- Remove the transmission housing with the Press Tool: T40323 .
-- Prepare the 1/4 inch tool with Torx T30 and flexible extension as shown.
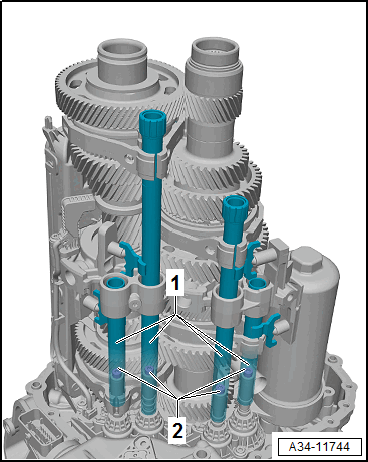
-- Remove the bolts -2- in the gear actuators -1-.
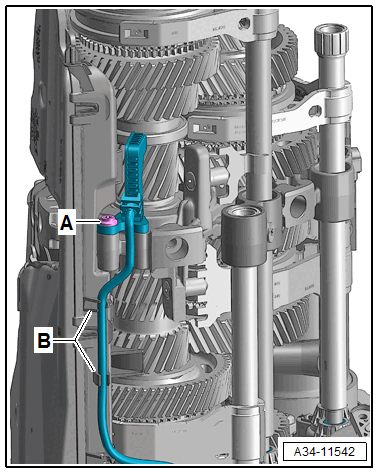
-- Remove the bolt for the Transmission Input Speed Sensor 1 - G632- -arrow A- and remove the wire from the oil pan -arrow B-.
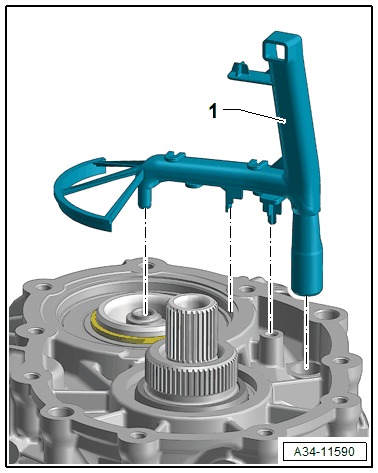
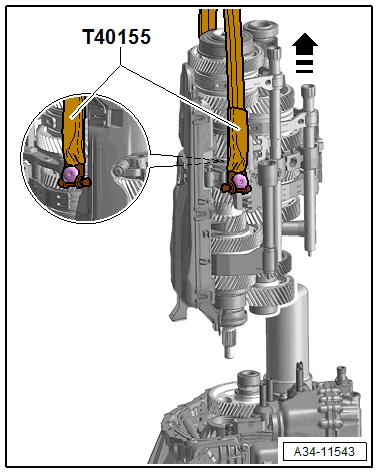
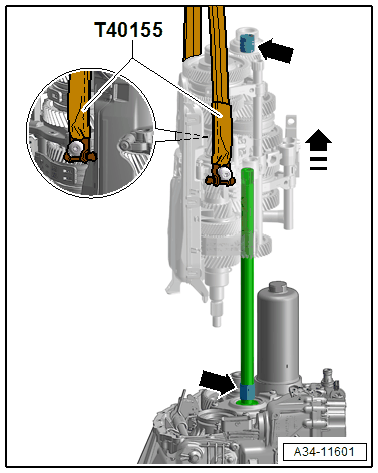
-- Secure the Retaining Strap: T40155 and Engine/Gearbox Support Shackle (2 pc.): 10-222A/12 on the gear set as shown and slowly and carefully remove with the Shop Crane: VAS 6100 from the transmission housing.
Tip:
For transmissions with a self-locking center differential, make sure that both bearings -arrows- do not fall when removing.
-- If necessary, remove the roller bearing and the inner output shaft. Refer to Inner Output Shaft Roller Bearing, Removing, Vehicles with Self-Locking Center Differential .