Transmission, Disassembling And Assembling: Installing
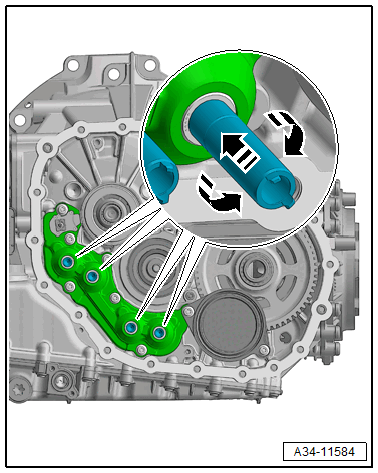
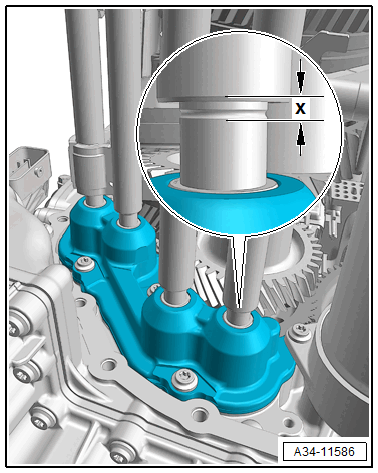
-- Bring the gear actuator into the basic setting.
-- Push the gear actuator by hand and turn it at the same time until it engages and determine the current backlash.
Vehicles with self-locking center differential

-- Check if the needle bearing -arrow- is installed.
Continuation for all vehicles
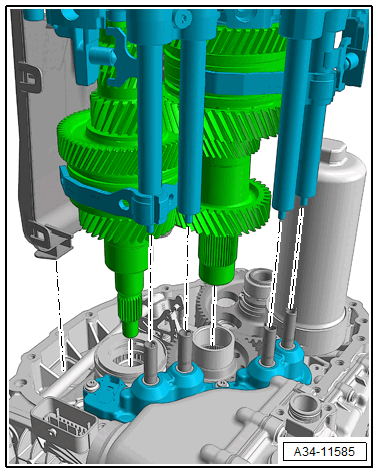
-- Carefully insert the gear set.
-- Evenly combine the bearing area and the gear actuator.
Vehicles with self-locking center differential
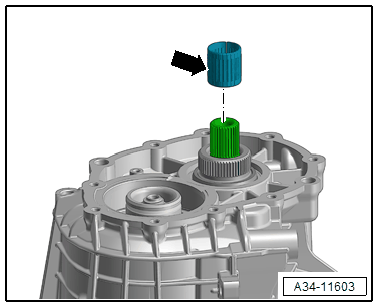
-- Install the needle bearing -arrow-.
Continuation for all vehicles
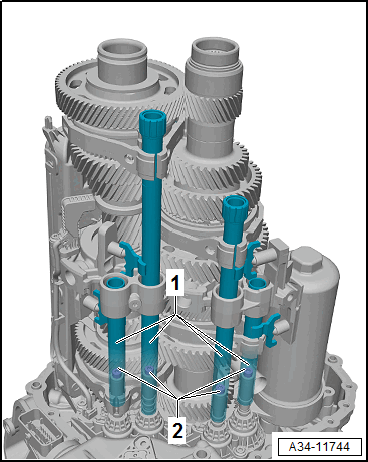
-- Hand tighten the bolts -2- in the gear actuators -1-.
-- Tighten the bolts for the gear positioner to the tightening specification.
-- Install the Transmission Input Speed Sensor 1 -G632- and tighten the bolt -A-.
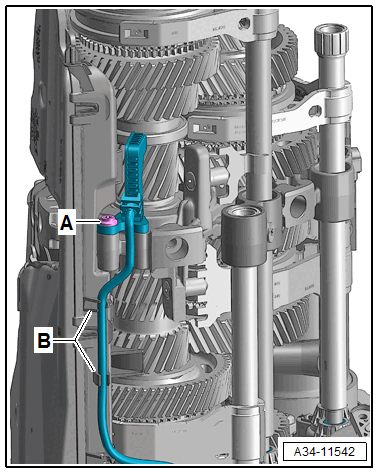
-- Install the wire in the bracket -B- at the same time pay attention to the correct routing.
-- Install the Gearbox Assembly Tool: T40213A on the transmission.
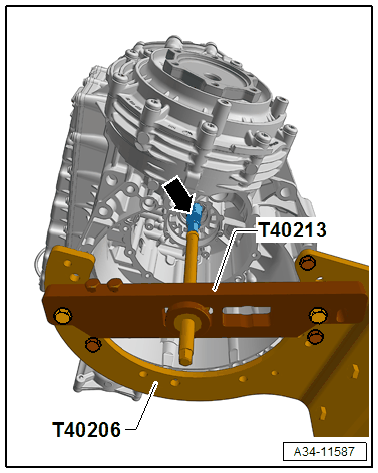
Tip:
- This step is necessity to that the bearing "E" in the transmission housing can be mounted correctly on the shaft.
-- Install the spindle from the Gearbox Assembly Tool: T40213A by hand until the input shaft has raised approximately 2 to 3 mm and there is a small resistance when turning.
-- Position the new seal on the clutch housing and check if both centering pins are installed.
-- AWD vehicles: slide the Assembly Tool: T40367 -1- onto the transmission output shaft.
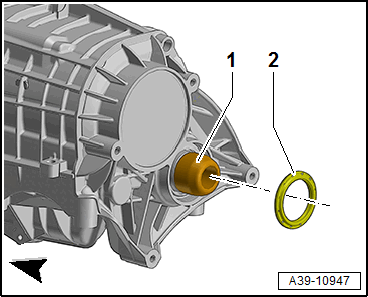
- Ignore -item 2-.
- The Assembly Tool: T40367 acts as an assembly aid when assembling the transmission housing.
-- Warm the inner race of the bearing "E" -arrow- with the Hot Air Blower: V.A.G 1416 to a maximum of 100 °C (212 °F).
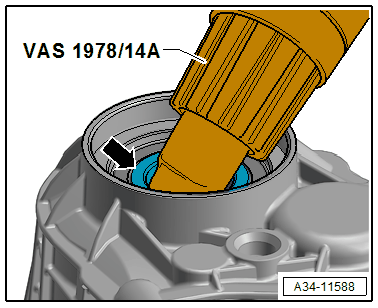
Risk of damaging the bearing seal.
- Only warm up the inner bearing race.
-- Guide the transmission housing with the transmission.
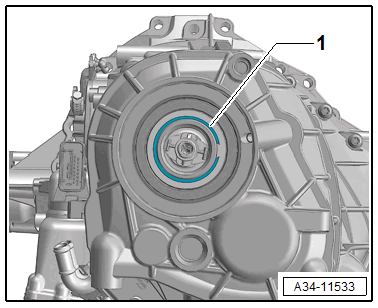
-- Install the new circlip -1- for the bearing "E".
- The circlips have different installed dimensions.
- If the bearing "E" is not replaced, a circlip with the same dimension as the old circlip must be installed.
- For a new bearing "E" the largest possible circlip to be installed must be used.
-- Remove the Gearbox Assembly Tool: T40213A from the transmission.
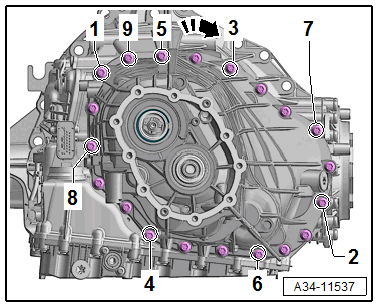
-- Tighten the transmission housing with new bolts.
-- Tighten the bolts for the transmission housing to the tightening sequence. Refer to Figure.
-- Push in the centering bracket -A- for the gear set all the way.
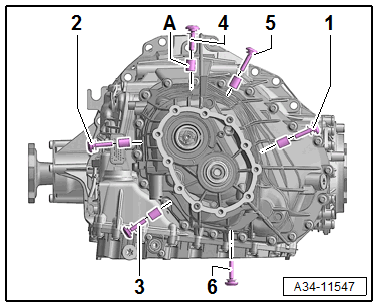
Tip:
- Bolt -6- without centering sleeve.
-- Tighten the new bolts for the gear set -1 to 6- to the tightening sequence. Refer to Figure.
Vehicles without self-locking center differential
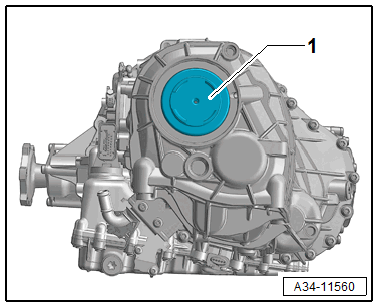
-- Install the oil catch tray -1-.
-- Press in the new end cover with the Press Tool: T40323 .
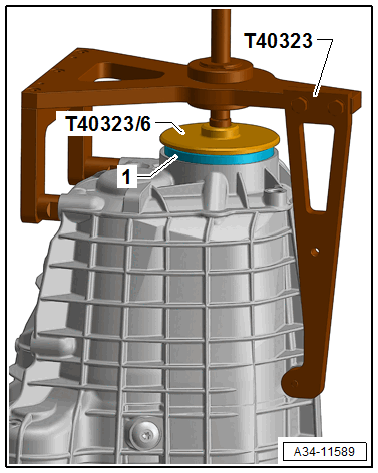
Oil loss due to improper assembly!
- The end cover is installed "dry". Never use retaining compound.
- Let the end cover be tensioned 10 minutes with the Press Tool: T40323 .
Vehicles with self-locking center differential
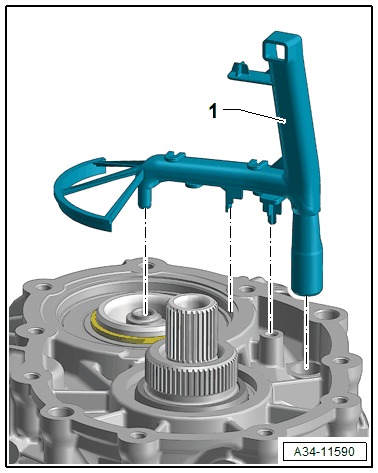
-- Install the oil catch tray -1-.
-- Installing the self-locking center differential. Refer to the appropriate Service Information .
Continuation for all vehicles
-- Dual Clutch, Installing. Refer to DUAL CLUTCH, REMOVING AND INSTALLING .
-- Fill the ATF. Refer to ATF, DRAINING AND FILLING .
-- Fill the transmission fluid. Refer to TRANSMISSION FLUID, DRAINING AND FILLING .
-- If equipped, install the all-wheel drive clutch. Refer to ALL-WHEEL DRIVE CLUTCH, REMOVING AND INSTALLING .
-- Dispose of the hydraulic pressure reservoir. Refer to HYDRAULIC PRESSURE RESERVOIR, DISPOSING .