Removing the rear window (rear window broken)
NOTE:
TECHNICAL INFORMATION
The following procedure forms the basis for these repair instructions and must be observed without fail.
For more information see: 51 31... GENERAL PROCEDURE for disassembly/installation of bonded window glass
The following procedure forms the basis for these repair instructions and must be observed without fail.
For more information see: 51 31... GENERAL PROCEDURE for disassembly/installation of bonded window glass
Preliminary works
- Remove the rear left and right water channel TRIM PANEL .
- Remove both c-pillar TRIM PANELS
- Remove additional brake light TRIM
- Remove additional BRAKE LIGHT .
CAUTION:
Glass splinters due to damaged windscreen/rear or side windows
Danger of injury!
Danger of injury!
- Wear safety goggles and cut-resistant protective gloves.
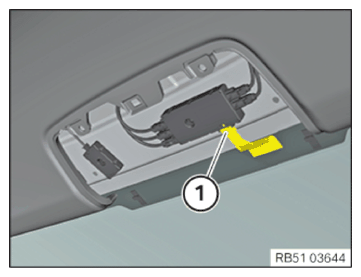
- Unlock plug connection (1) and disconnect.
- Secure cable to rear window with adhesive tape.
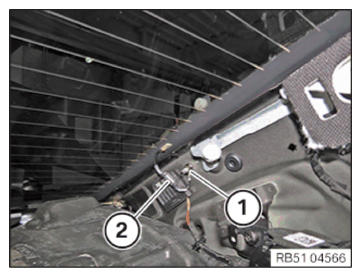
- Loosen nut (1).
- Remove the cable (2).
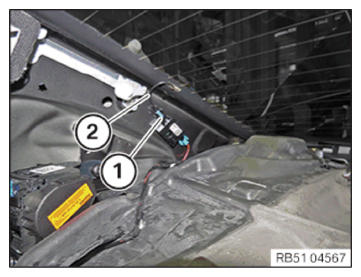
- Unlock plug connection (1) and disconnect.
- Remove the cable (2).
- Remove the rear window with a suitable tool (for example, cutter with an oscillating knife or a special tool 0 410 807 ).
- Remove all the broken glass (even from under the seats).
- Check seat belts:
- Condition of seat belt strap
- Function of automatic reel
- Seat belt locking reel
- Seat belt buckle
Replace damaged or defective parts.
- If necessary, remove the broken glass from the housing box of the roller cover for luggage compartment.
- If necessary, check the automatic reel of the roller cover for luggage compartment.
- Remove the adhesive bead from the body using special tool 0 410 436 and clean the adhesive area.