Installing air conditioning compressor
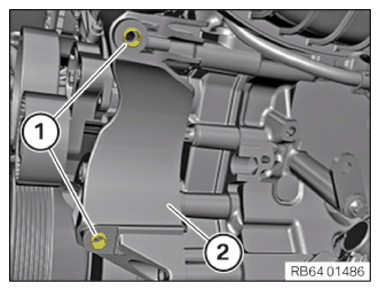
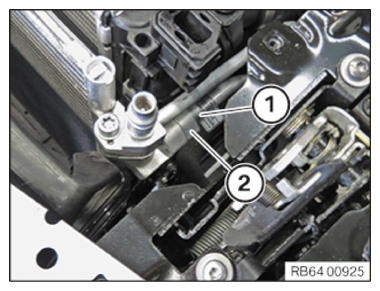
- Centering sleeves (1) on bearing bracket (2) for the air conditioning compressor must not be damaged or missing, replace centering sleeves as needed.
- Replace the sealing rings with the special tool 0 496 714 (00 9 030)
.
Parts: Sealing rings
- Replace the guide sleeves using special tool 2 298 505
.
Parts: Guide sleeves
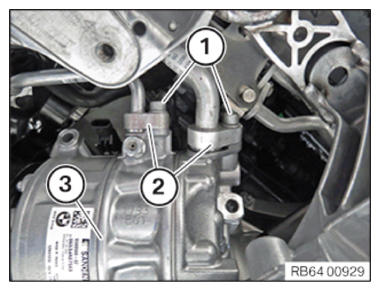
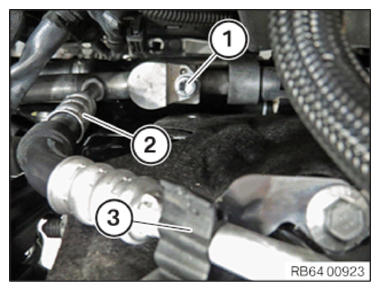
- Correctly feed out the air conditioning compressor (3).
- Position refrigerant line (2) correctly.
- Tighten down screws (1).TIGHTENING TORQUES SPECIFICATION
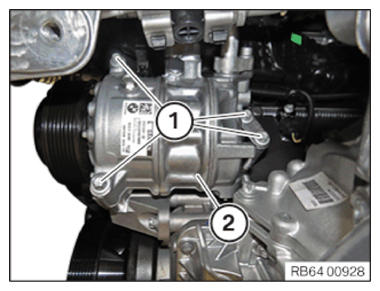
Refrigerant line on air conditioning compressor M8 Tightening torque 19 Nm - Feed in and correctly position air conditioning compressor (2).
- Tighten down screws (1).TIGHTENING TORQUES SPECIFICATION
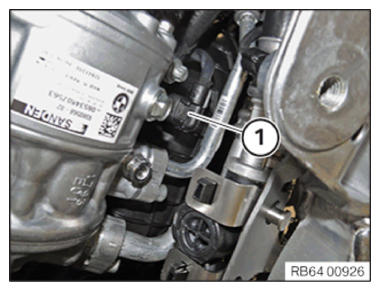
Air conditioning compressor to holder/engine M8 Tightening torque 22 Nm - Connect plug (1).CAUTION: Component with preload.
Injury hazard!- Reduce preload as far as possible before disassembly. Relieve component.
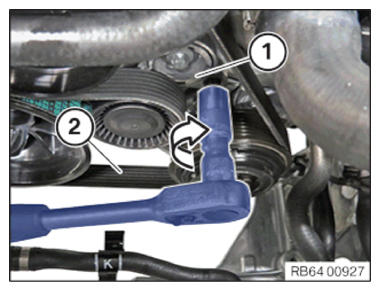
- Raise the preloading on the belt tensioner (1) in the arrow direction.
- Correctly fit drive belt (2) on the air conditioning compressor and tensioning pulley.
- Replace the sealing ring using the special tool 0 496 714 (00 9 030)
.
Parts: Sealing ring
- Correctly position the refrigerant line (2) on the air conditioning condenser.
- Tighten down screw (1).TIGHTENING TORQUES SPECIFICATION
Refrigerant line to air conditioning condenser/connecting piece M8 Tightening torque 19 Nm - Close the holder (1).
- Replace the sealing ring using the special tool 0 496 714 (00 9 030)
.
Parts: Sealing ring
- Position the refrigerant pipe (2) correctly and tighten the screw (1).TIGHTENING TORQUES SPECIFICATION
Refrigerant pipes to refrigerant pipe M8 Tightening torque 19 Nm - Position refrigerant pipe correctly and close the holder (3).
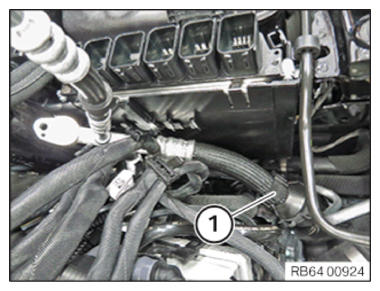
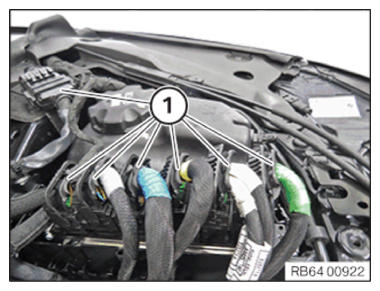
- Connect connectors (1) and lock.
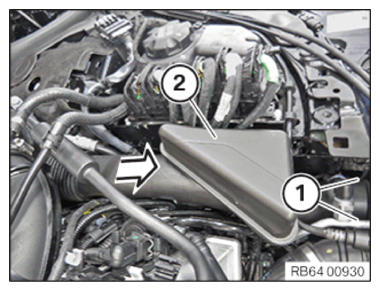
- Arrange air duct (2) and slide in the arrow direction.
The detents (1) must lock correctly.
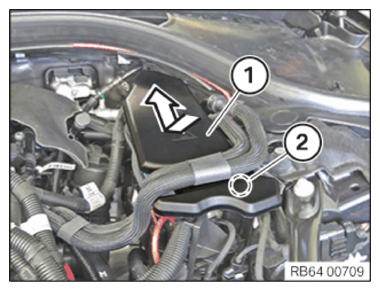
NOTE: Schematic diagram is for example purposes. Some parts may differ in certain details. - Correctly position the cover (1) and slide it in the direction of the arrow.
The cover (1) must engage correctly in the marked area (2).
Follow-up work
- Install the STEERING GEAR .
- Install the UNIVERSAL JOINT .
- Attach both tie rod ends to the SWIVEL BEARING .
- If installed: fasten the ACTIVE STABILIZER (additional work for ARS).
- Install the ANTI-ROLL BAR .
- Install the THRUST FIELD .
- Install the UNDERBODY PROTECTION of the steering gear or the front thrust field.
- Install the front UNDERBODY PROTECTION .
- Install the front left and right WHEELS .
- Install fan COWL .
- Install the rear top CROSS CONNECTION .
- Install front CROSS CONNECTION .
- Install left and right front-end STRUT .
- Install the top right engine compartment COVER .
- Install the top engine compartment COVER .
- Install intake filter HOUSING .
- Install acoustic COVER .
- Evacuate and charge CONDITIONING .
- Run in the new air conditioning COMPRESSOR .
- Perform chassis ALIGNMENT CHECK .
- CHECK the airbag for function.