Installing the rear rubber mount for the rear axle support
NOTE:
Description is for left component only. Procedure on the right side is identical.
Preparing the rubber mount for installation
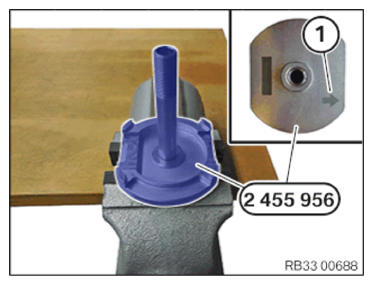
- Clamp special tool 2 455 956 in vice.
- Observe the arrow position (1)
on the lower side of the special tool 2 455 956
.
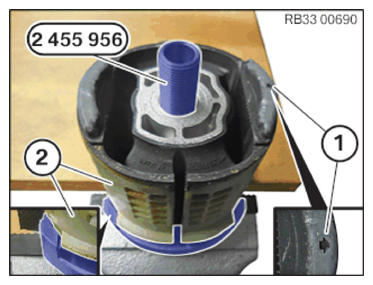
- Position the rubber mount (2)
correctly:
The arrow (1) must point in the same direction as the arrow on the special tool 2 455 956 .
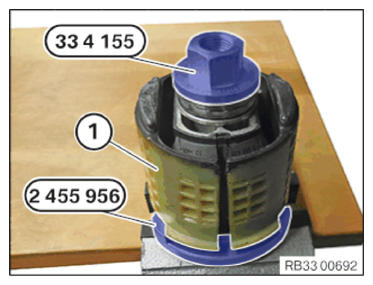
- Tighten the rubber mount (1) on the special tool 2 455 956 with the special tool 0 492 412 (33 4 155) up to the limit position
.
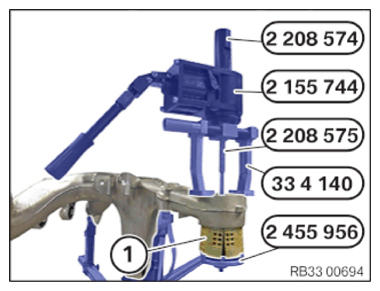
Aligning the rear rubber mount on the rear axle support
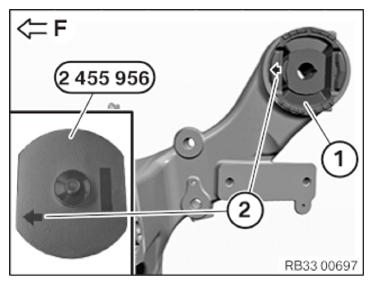
- Align rear rubber mount (1)
in direction of travel by means of the arrow on special tool 2 455 956
or on rubber mount (2)
.
(F) = Direction of travel (view of rear axle support from below)
- Pull the rubber mount (1) with the special tools 2 455 956, 0 492 397 (33 4 140), 2 208 575, 2 155 744 and 2 208 574 in the rear axle support .
- Remove the special tools.
Follow-up Work
- Install complete rear AXLE SUPPORT .
- Secure REAR AXLE .
- Secure the wheel carrier rear left and right air SUSPENSION STRUTS .
- Secure rear left and right BRAKE CALIPER .
- If installed: fasten CABLE .
- If installed: connect the CABLE .
- Connect the left and right CONNECTOR .
- Secure right and left CABLES .
- Connect the rear ride height sensor CONNECTOR .
- Secure the rear axle differential PROPELLER SHAFT .
- Install the rear HEAT SHIELD .
- If installed: install the torsion struts MOUNTING BLOCK .
- Install EXHAUST SYSTEM .
- Install the left and right camber control arm COVER .
- Install the tank COVERS
- Install the left and right REAR WHEEL .