Remove all valve springs
Preliminary works
- Refer to INSTALLING THE CYLINDER HEAD ON THE SPECIAL TOOL .
- Refer to CHECKING THE POSITION OF THE INTAKE CAMSHAFT (CYLINDER HEAD REMOVED)
- Refer to REMOVE THE TORSION SPRINGS .
- Refer to REMOVING ALL GATES .
- Refer to REMOVING ALL INTERMEDIATE LEVERS .
- Refer to REMOVE INTAKE CAMSHAFT .
- Refer to REMOVE THE SERVOMOTOR FOR THE ECCENTRIC SHAFT (CYLINDER HEAD REMOVED) .
- Refer to REMOVE ECCENTRIC SHAFT .
- Refer to REMOVE EXHAUST CAMSHAFT .
- Refer to REMOVE ALL ROLLER CAM FOLLOWERS .
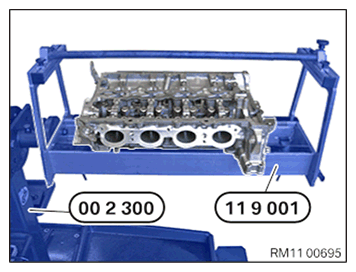
- Mount and bolt special tool 0 494 366 (11 9 001) on special tool 0 495 187 (002 300).
- Mount and bolt the cylinder head to the special tool 0 494 366 (11 9 001).
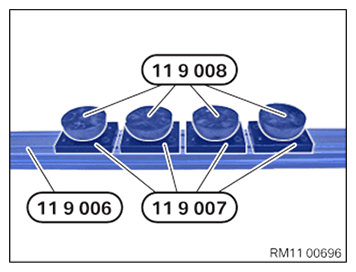
- Prepare the special tools 0 494 371 (11 9 006), 0 494 372 (11 9 007)
and 0 494 373 (11 9 008)
as shown.
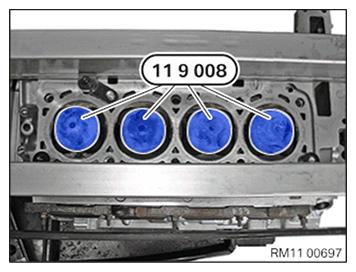
- Make sure that the special tools 0 494 373 (11 9 008)
are positioned as shown in the next operation.
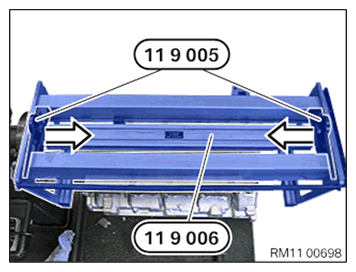
- Turn round special tool 0 494 371 (11 9 006) and insert as shown.
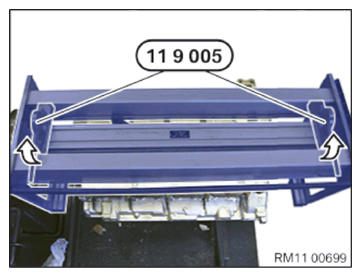
- Slide the special tool 0 494 370 (11 9 005)
in the direction of the arrow.
- Lock special tool 0 494 370 (11 9 005) in the direction of the arrow.
- Rotate the cylinder head with the special tool 0 494 362 (11 9 000)
by 180° into the installation position.
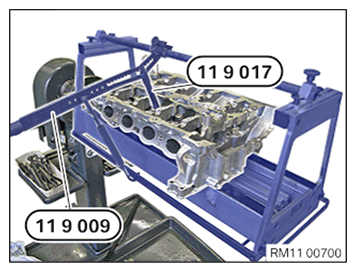
- Align special tool 0 494 374 (11 9 009)
in direction of valve axis.CAUTION: Component with preload.
Danger of injury!- Reduce preload as far as possible before disassembly. Relieve component.
- Press down the valve spring on the upper spring cup with the special tools 0 494 374 (11 9 009)
and 0 495 028 (11 9017).
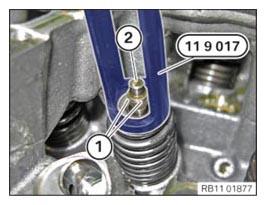
- Keep the valve spring pressed down with the special tool 0 495 028 (11 9 017).
- Remove the valve shims (1) with a magnet from the valve (2).
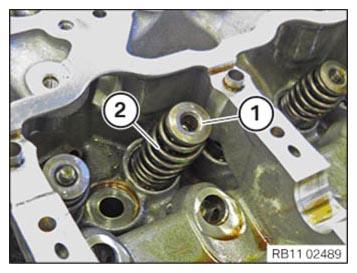
- Carefully relieve the valve spring.
- Set the spring cup (1)
and the valve spring (2) down in the special tool 0 495 105 (11 4 480)
in order.