Installing the heating and air-conditioning unit
NOTE:
RISK OF DAMAGE, Damage caused by water ingress into the vehicle. Water ingress into the vehicle may result in damage to components, malfunctions and corrosion.
- Ensure correct installation of the components.
- Only use undamaged components.
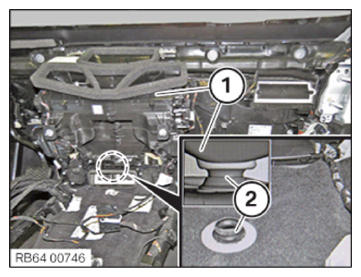
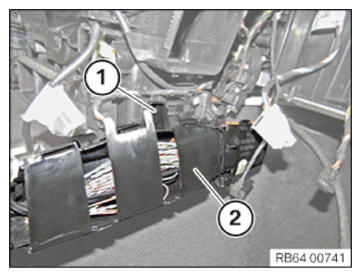
- Apply lubricant to the condensate drain (2) before installation of the heating and air-conditioning unit (1).INSTALLATION AID - LUBRICANTS DESCRIPTION
Lubricants G14 900 ml, Can 83232360412 - Insert the heating and air-conditioning unit (1).
- Ensure the heating and air-conditioning unit (1) is positioned exactly on the condensate drain (2).
- Perform a visual inspection after installing the heating and air-conditioning unit (1).
- For equipment specifications with electric auxiliary heater:
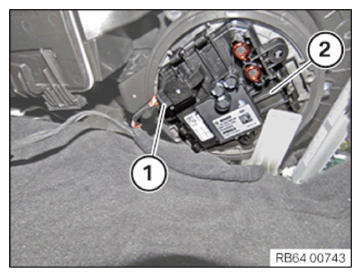
Correctly position the ground cable (2) and tighten the nut (1).TIGHTENING TORQUES SPECIFICATION
Ground cable to ground support point Nut Tightening torque 8 Nm - Position and connect the connector (1) on the blower (2).NOTE: Perform the steps on the right and left side.
- Slide the air duct (2) upwards until the detents (1) engage properly.
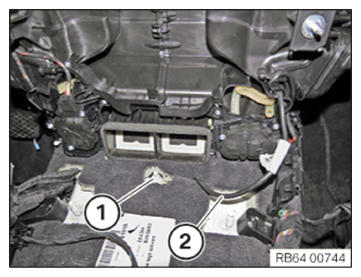
- Correctly position the cable duct (2) and clip into the detent (1).
- Guide in sealing flange (4) at the cowl (5) and position correctly.
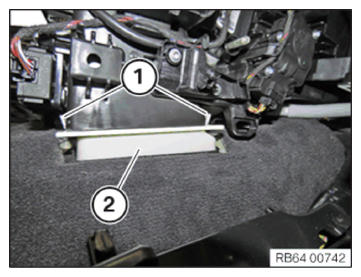
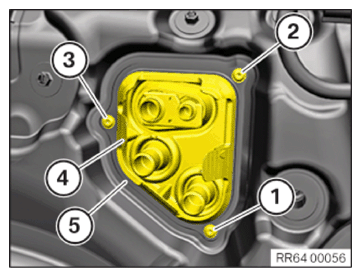
- Tighten the bolts in the following sequence: (1), (2) and (3).TIGHTENING TORQUES SPECIFICATION
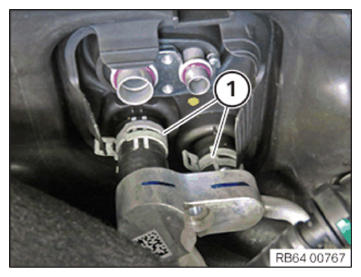
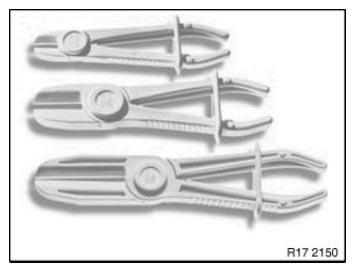
Heating and air-conditioning unit to cowl Oval-head screw Tightening torque 2.8 Nm - Correctly push on the coolant hoses and secure the hose clamps (1) using special tool 0 495 794 (17 2 050).
- Remove disconnection tools.
Follow-up work
- Install the THRUST FIELD .
- Install front STIFFENING PLATE .
- Install rear UNDERBODY PROTECTION .
- Install EXPANSION VALVE .
- Install the dashboard SUPPORT .
- Connect the expansion valve REFRIGERANT LINE
- Attach the intake pipe BRACKET .
- Install left front-end strut left intake FILTER HOUSING .
- Install coolant EXPANSION TANK .
- Install the bracket for cylinders 5 to 8 CONTROL UNIT .
- Install clean top AIR PIPE .
- Install the left DME control unit COVER .
- Install ACOUSTIC COVER .
- Install instrument panel TRIM .
- Install the INSTRUMENT CLUSTER (KOMBI).
- Install the steering column SWITCH CLUSTER (SZL).
- Install steering lower section COLUMN SHROUD .
- Fit steering upper section COLUMN SHROUD .
- Install STEERING WHEEL .
- Install STEERING WHEEL .
- Install the steering wheel or sports steering wheel AIRBAG UNIT .
- Install the M sports steering wheel AIRBAG UNIT .
- Install the left fold-out COMPARTMENT .
- Install the CENTRAL INFORMATION DISPLAY (CID).
- Install the left dashboard DECORATIVE STRIP .
- Install the light OPERATING UNIT .
- Install the left dashboard SIDE PANEL .
- Install left and right a-pillar TRIM PANEL .
- Install right a-pillar footwell side TRIM PANEL .
- Install the left a-pillar footwell side TRIM PANEL .
- Install both inner front door sill COVER STRIPS .
- Install the dashboard MID-RANGE SPEAKERS .
- Install the dashboard SPEAKER TRIM .
- Install the HEADUNIT HIGH (HU-H).
- Install radio operating unit and air conditioning CONTROL PANEL .
- Install the right dashboard DECORATIVE STRIP .
- Install the right dashboard SIDE PANEL .
- Install the CENTER CONSOLE .
- Install the right footwell TRIM PANEL .
- Install the pedal assembly TRIM PANEL .
- Install the CUP HOLDER .
- Install the center CONSOLE TRIM .
- Install front storage COMPARTMENT TRIM .
- Install the CENTER ARMREST .
- Install the center armrest STORAGE COMPARTMENT .
- Install the rear center CONSOLE TRIM .
- Install the rear VENTILATION GRILLE .
- Install the rear VENTILATION GRILLE (air conditioning system with 4-zone control).
- Install the rear passenger compartment air conditioning CONTROL PANEL (integrated automatic climate control with 4-zone control).
- Reconnect all battery GROUND LEADS .
- EVACUATE AND CHARGE conditioning.
- FILL AND VENT the coolant circuit.