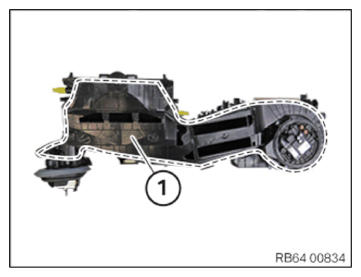
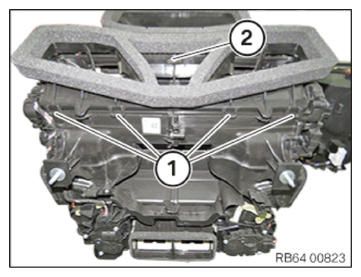
Installing the evaporator
- Insert the evaporator (1) in the distributor housing (2) correctly.
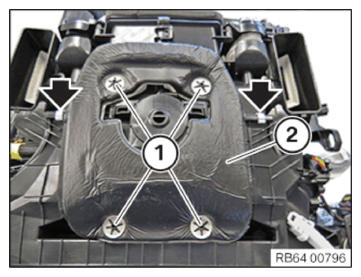
- Position distributor housing upper section (1) correctly and tighten all screws in the marked area.TIGHTENING TORQUES SPECIFICATION
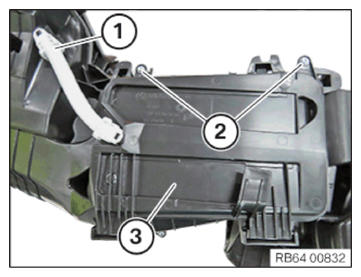
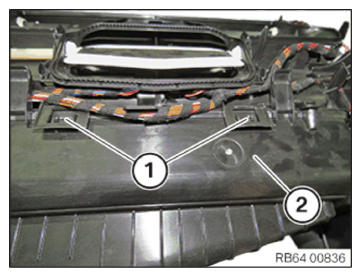
Heater/air conditioner Screw Tightening torque 1.2 Nm - Correctly insert both microfilters (1).
The marks on the microfilters (1) must always point in the direction of the blower (2).
- Correctly position the cover of the microfilter housing (3) and tighten screws (2).TIGHTENING TORQUES SPECIFICATION
Microfilter lid on heating and air-conditioning unit Screw Tightening torque 2.8 Nm - Connect water drain hose (1).
- Turn the heating and air-conditioning unit around.
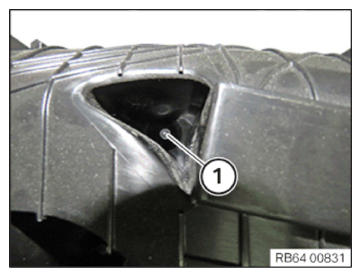
- Tighten down screw (1).TIGHTENING TORQUES SPECIFICATION
Heater/air conditioner Screw Tightening torque 1.2 Nm - Tighten down screw (1).TIGHTENING TORQUES SPECIFICATION
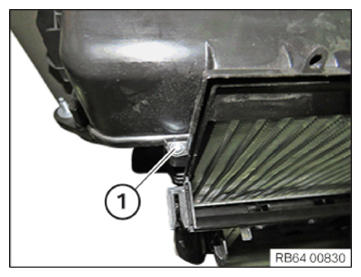
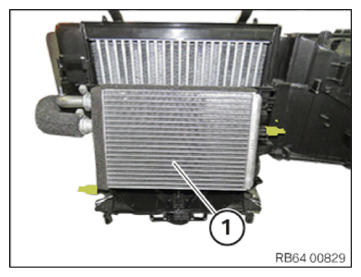
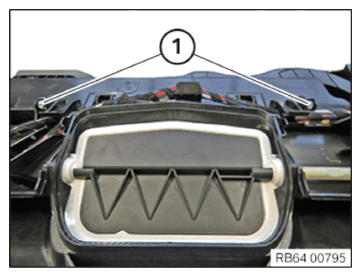
Heater/air conditioner Screw Tightening torque 1.2 Nm - Insert heat exchanger (1) correctly.
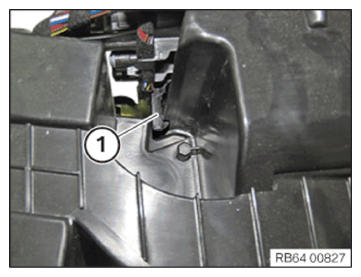
- Correctly position the housing (2) and engage it in the detents (1).
- Engage the detent (1) on the housing (2) correctly.
- Lock detent (1) correctly.
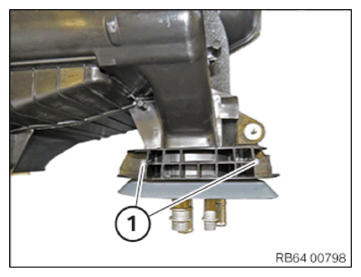
- Correctly position the bottom cover and tighten screws (1).TIGHTENING TORQUES SPECIFICATION
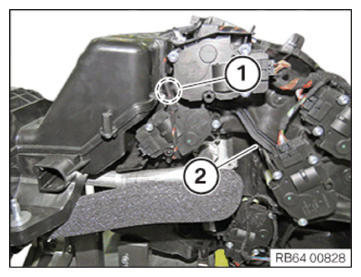
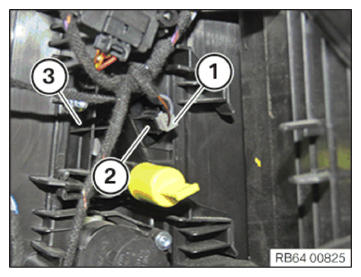
Heater/air conditioner Screw Tightening torque 1.2 Nm - Properly insert the evaporator temperature sensor (2) into the heating and air-conditioning unit (3) and connect the connector (1).
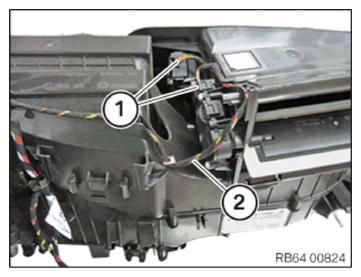
- Insert the wiring harness (2) and connect the connectors (1).
- Tighten down screws (1).TIGHTENING TORQUES SPECIFICATION
Heater/air conditioner Screw Tightening torque 1.2 Nm - Properly position the air distributor (2) and engage in the detents (1).
- Secure the clamps (arrows).
- Correctly position the foam material (2) and secure it with the holder (1).


Follow-up work
- Install the heating and AIR-CONDITIONING UNIT .
- Install the THRUST FIELD .
- Install front STIFFENING PLATE .
- Install rear UNDERBODY PROTECTION .
- Install EXPANSION VALVE .
- Install the dashboard SUPPORT .
- Connect the expansion valve REFRIGERANT LINE
- Attach the intake pipe BRACKET .
- Install left front-end strut left intake FILTER HOUSING .
- Install coolant EXPANSION TANK .
- Install the cylinders 5 to 8 control unit BRACKET .
- Install top clean AIR PIPE .
- Install the left DME control unit COVER .
- Install acoustic COVER .
- Install instrument panel TRIM .
- Install the INSTRUMENT CLUSTER (KOMBI).
- Install the steering column SWITCH CLUSTER (SZL).
- Install steering column lower section SHROUD .
- Fit steering column upper section SHROUD .
- Install STEERING WHEEL .
- Install STEERING WHEEL .
- Install the steering wheel or sports steering wheel AIRBAG UNIT .
- Install the M sports steering wheel AIRBAG UNIT .
- Install left fold-out COMPARTMENT .
- Install the CENTRAL INFORMATION DISPLAY (CID).
- Install the left dashboard DECORATIVE STRIP .
- Install the light OPERATING UNIT .
- Install the left dashboard SIDE PANEL .
- Install left and right a-pillar TRIM PANEL .
- Install right a-pillar footwell side TRIM PANEL .
- Install the left a-pillar footwell side TRIM PANEL .
- Install both inner front door sill COVER STRIPS .
- Install the dashboard MID-RANGE SPEAKERS .
- Install the dashboard speaker TRIM .
- Install the HEADUNIT HIGH (HU-H).
- Install radio operating unit and air conditioning CONTROL PANEL .
- Install the right dashboard DECORATIVE STRIP .
- Install the right dashboard SIDE PANEL .
- Install the CENTER CONSOLE .
- Install the right footwell TRIM PANEL .
- Install the pedal assembly TRIM PANEL .
- Install the CUP HOLDER .
- Install the center CONSOLE TRIM .
- Install front storage compartment TRIM .
- Install the CENTER ARMREST .
- Install the center armrest STORAGE COMPARTMENT .
- Install the rear center console TRIM .
- Install the rear VENTILATION GRILLE .
- Install the rear VENTILATION GRILLE . (air conditioning system with 4-zone control)
- Install the rear passenger compartment air conditioning CONTROL PANEL (integrated automatic climate control with 4-zone control).
- Reconnect all battery GROUND LEADS .
- EVACUATE and charge conditioning.
- FILL and vent the coolant circuit.